


Meet Pathfinder, your new favorite tool in InDesign or Illustrator! In Adobe Illustrator and InDesign, there are only a few basic shape tools: circles, rectangles, and regular polygons. If you’re used to the endless depth of shape libraries in Microsoft Office or Google Docs, it might seem initially limiting. However, Illustrator and InDesign’s pathfinder tool makes it possible to create new, custom shapes by combining simple ones—which makes it possible to draw absolutely anything. If you’ve never used pathfinder, don’t be intimidated! It’s easy to use and pretty forgiving if you mess up (because you can just press “undo” and try again). Go to Window > Pathfinder in either program to open the window if it isn’t kept in your default workspace by default. (If you love using it, consider adding it to your workspace. I like to keep all of the shape-building tools, including Align and Transform, pinned to the side of my window in case I need them!)
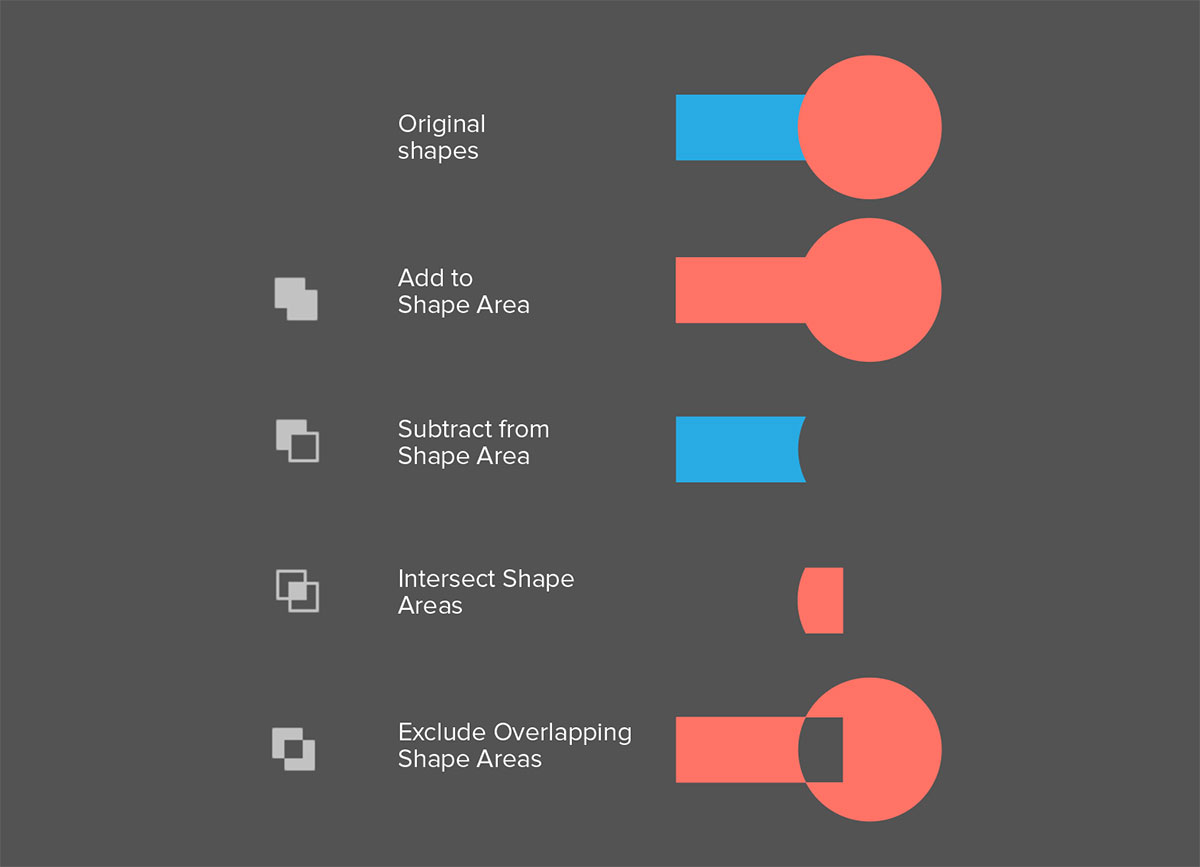 This graphic visually explains the four pathfinder tool options used in this tutorial.
This tutorial will act as a quick introduction to pathfinder, focusing on the most common tools along the bottom of the menu. If you are looking for a more in-depth explanation of its various uses and applications, see this more thorough guide for combining shapes. Note: Before we begin, realize that you cannot “un-pathfind” shapes once you use this tool. You can manipulate points on your shapes using the white arrow tool, but pathfinder is different from grouping objects because it fuses them completely and does not leave the original shapes intact. For When You Want to Make a Complex Shape Maybe you have three circles that you want to merge into a snowman. Maybe you have multiple rectangles that, together, create a maze. Maybe you have a triangle and a square that make a house. Whatever shape you want to make, pathfinder can help you add simple shapes together to create a custom shape. Compared to the other capabilities of pathfinder, this one is easiest to visualize. All you have to do is imagine how you would build your ideal shape out of the ones at your disposal. Then, use your mouse to click on all of the shapes you would like to combine (either by highlighting over all of them or using shift+click to select multiple at once) and click the Add to Shape Area button (the first one) in pathfinder.
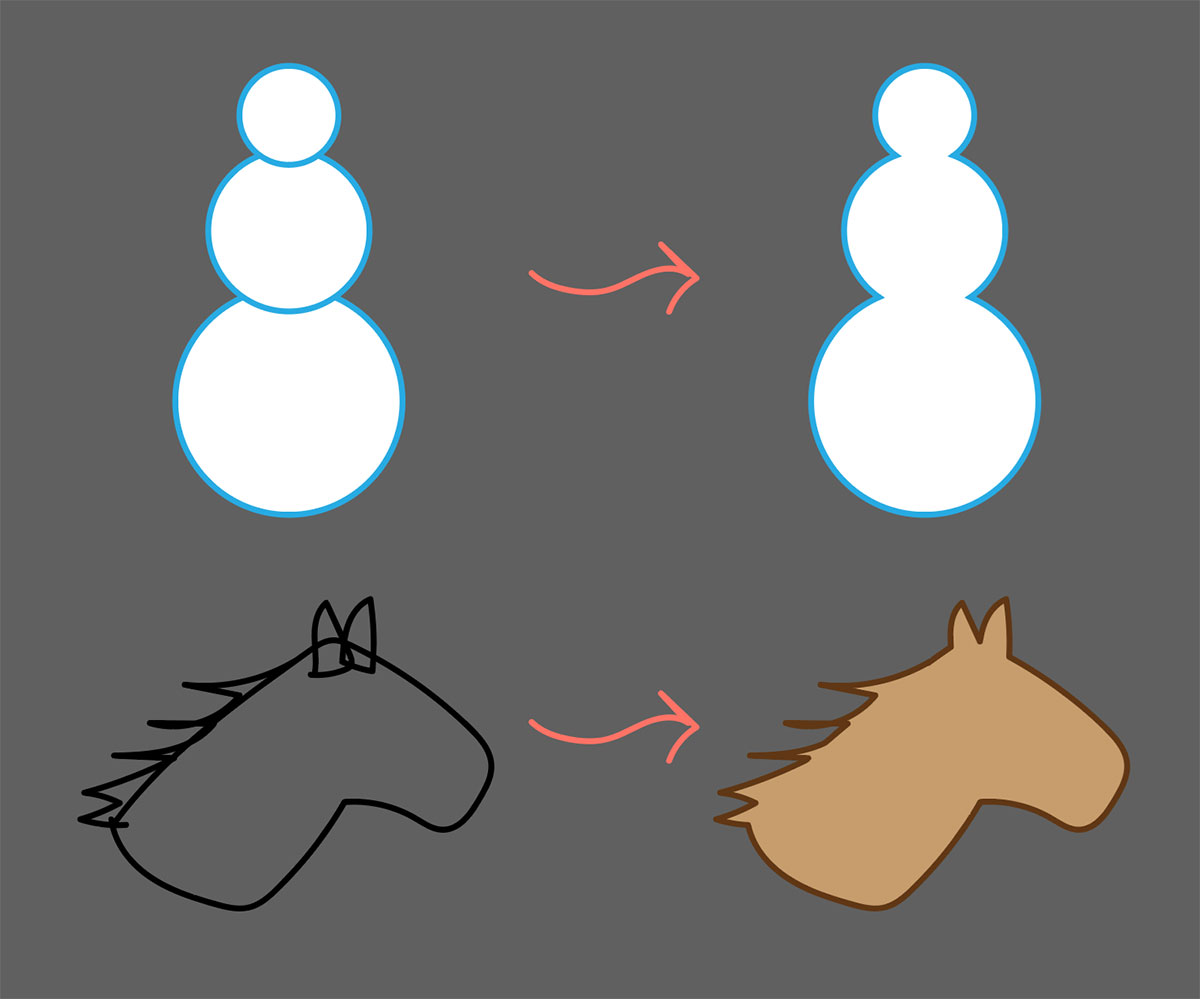 You can use pathfinder to create shapes from existing ones (circle, rectangle) or ones you draw yourself with the pen tool.
If you’re wondering why anyone would use this instead of just drawing multiple shapes, consider the difference between handling one shape and many! Reducing an element to one shape makes a document far easier to manage (since you can move it around with one click) and also allows you to add a border without creating overlapping outlines. For When You Want to Make Rested Circles
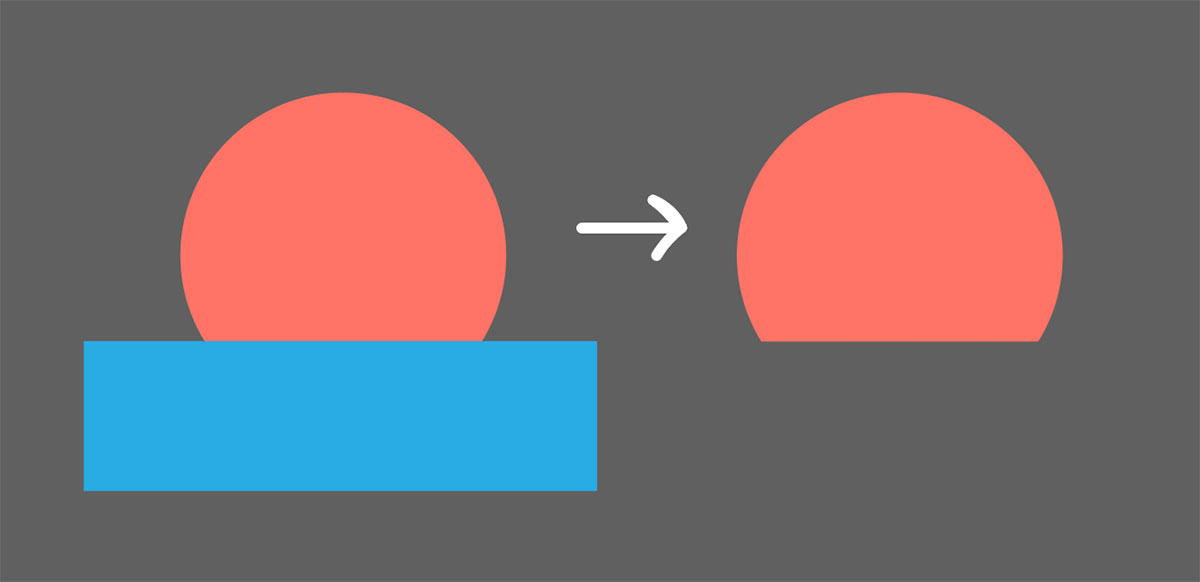
 Resting circles are circles with a “base” of a flat side on the bottom.
Sometimes circles are easier to design with when they have a “base” cut out of the bottom. Using pathfinder, you can use the tool to draw a rectangle that covers this section of the circle. The shape that you want to remove has to be on top and the one you want to remain will be on bottom. You can imagine that using this pathfinder option is like having a hole-punch over a piece of paper. The top layer is the punch shape and the bottom layer is the final material.
Click the Subtract from Shape Area (the second one) button to cut out any overlapping areas. You can also use this tool to create numbers or letters popped out of circles, subtract white sections of a logo in order to make it transparent, or remove the circles and semicircle of a “smile.” For When You Want to Create Split Reverse Text
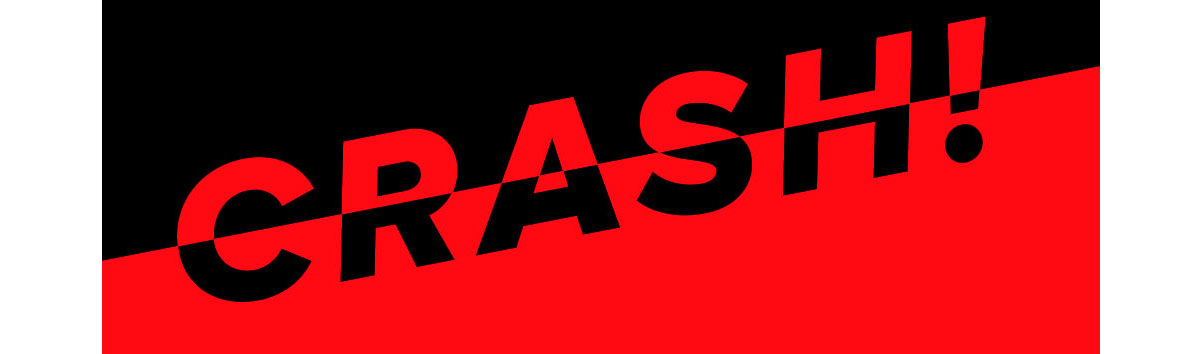
The Exclude Overlapping Shape Areas tool (the fourth one) will create holes where the shapes intersect but keep the pieces that don’t overlap—which you can use to create cool effects. One common use for this tool is to create text that changes color over a horizontal line.
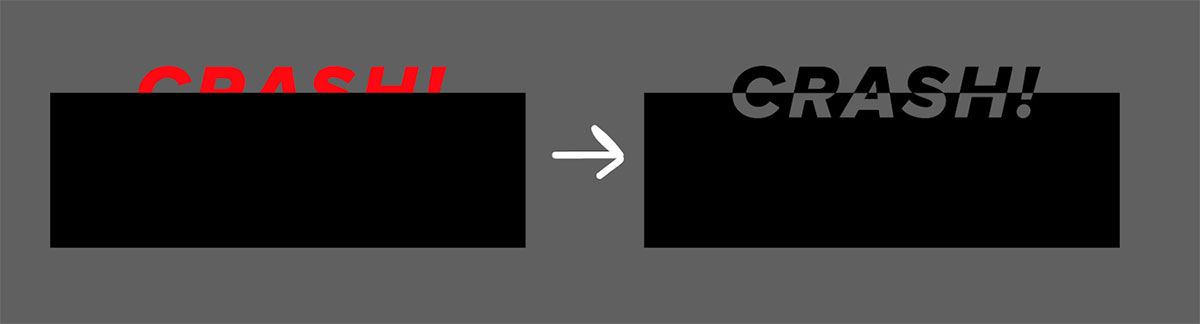
To make this work, change your text from letters into shapes by going to Type > Create Outlines. Then, draw a rectangle that covers half of your text and click the third pathfinder button. If you want to make this rectangle larger later, you can manipulate the bottom corners using the white arrow tool. For When You Want to Make a Pie Chart There are many great tools out there for making pie charts, but sometimes you just want to design your own. Using pathfinder, you can cut up a normal circle and make it into a pie chart. It’s helpful to create one in another program first, like Google Sheets or Microsoft Excel, just so you have a reference for how large each slice has to be.
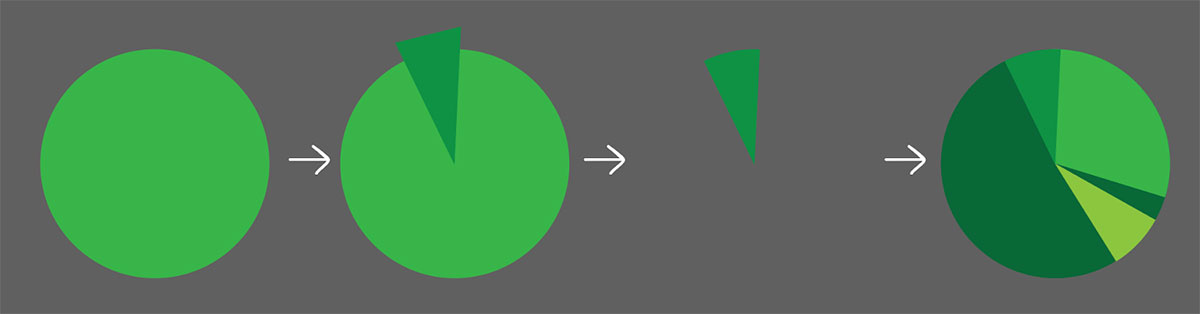
Start by drawing a circle that fits over your reference. Give it a 50% opacity so that you can still see the sections of the pie you’ll need to cut. Then, use your pen tool to draw a rough triangle that fits the pie shape you need. Click the third pathfinder tool—Intersect Shape Areas (the third one). Repeat for each section of the pie. It is easiest if you “copy” your original circle and keep pasting it in place so that you don’t end up with a sloppy chart. These were only a few of the projects for which you can use pathfinder, but it’s a very useful tool with powerful capabilities! For other methods of combining shapes, like compound paths and groups, see this guide. Are you a current student? See how you can save over 60%.