

Protecting a PDF with a password in Adobe Acrobat will keep the document from being copied or printed by others. Whether you’re submitting paperwork during onboarding for a job or simply sending an essay to a friend to edit, there are occasions when you might want to protect the content of a PDF document. The easiest way to do this is to password-protect the file in Adobe Acrobat. Once you’ve created the file and are ready to protect it, follow these steps. How to Protect a PDF with a Password
- Save your file as a PDF and open with Adobe Acrobat. You can create your file in any program (Microsoft Word, Excel, Adobe InDesign, Photoshop, Google Docs) as long as you save it as a PDF. Then, open the file in Adobe Acrobat.
- Under the “tools” menu, click “protect”. A bar will appear across the top of your document view with three options.
- Select “protect with password”.
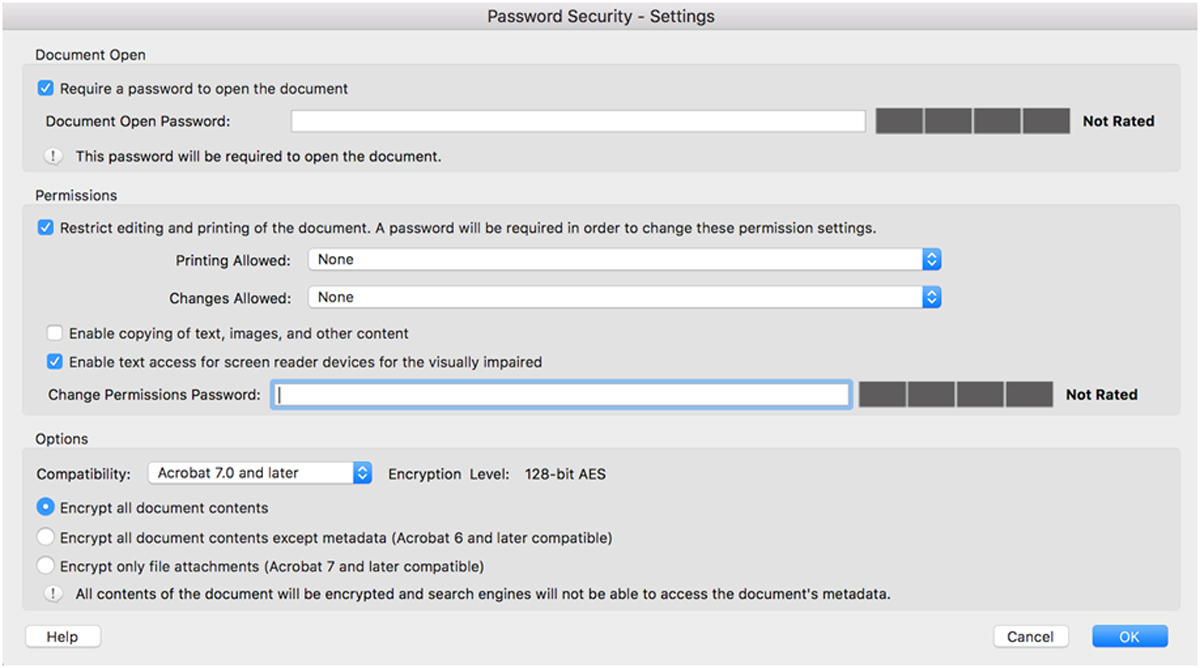
You can edit your settings in this window. Make sure you check “require a password to open the document.” If you want to keep others from copying it, uncheck “enable copying of text, images, and other content.” To keep others from printing, select “none” from the Printing Allowed dropdown menu. To learn more about what all of these options mean, discover the security methods available in Adobe Acrobat.
- Select a password. Once you have chosen a password to protect the document, make sure you remember it. You’ll need to share this with anyone who wants to be able to access the information in the document.
- Save the PDF. You’re done! If you want to remove password protection later, you will have to open the document again in Acrobat, disable the password, and re-save it.
Want to learn more skills in Adobe Acrobat? Learn how to digitize handwritten notes and keep your class notes organized. Are you a current student? See how you can save over 70%.