


Try these basic editing techniques in Adobe Premiere Pro and create a high-quality film that’s guaranteed to wow your friends! Do you have a knack for creative filmmaking but feel somehow intimidated by the perceived complexity of post production editing? Don’t worry! Adobe Premiere Pro offers a ton of useful tools that simplify the editing process and enable you to create film projects that will impress your family and friends. To get you started, here’re some easy-to-follow tips on how to edit your film like a pro in Adobe Premiere Pro. Use Storyboard to organize your thoughts To avoid making videos that are poorly structured and confusing to the audience, you can use a storyboard to develop and lay out the basic structure before even touching the timeline in Adobe Premiere Pro. Simply go to the Projects panel and activate Freeform View, which creates a work area where you can rearrange the clips by dragging the thumbnails into a custom layout. You can mark in and out points of any clip by clicking on the thumbnail and pressing “I” or “O” on your keyboard. When you’re done arranging the clips, you can highlight the clips and drag them into the timeline.
 How to retouch a photo by using color tools
Leverage B-roll to add another dimension to the visuals B-roll refers to supplemental or secondary footage that you add to the main clip to enrich your storytelling or join two clips that don’t integrate seamlessly. You can add b-roll by placing a clip containing the supplemental footage on a track above the one containing your main shot. You then cut back to the main clip when the b-roll is over. This technique is extremely useful when you’re editing primary footage that is too long or visually uninteresting. By adding b-roll that has a logical continuity, you can patch a cut and add creative dramatic effects to your film.
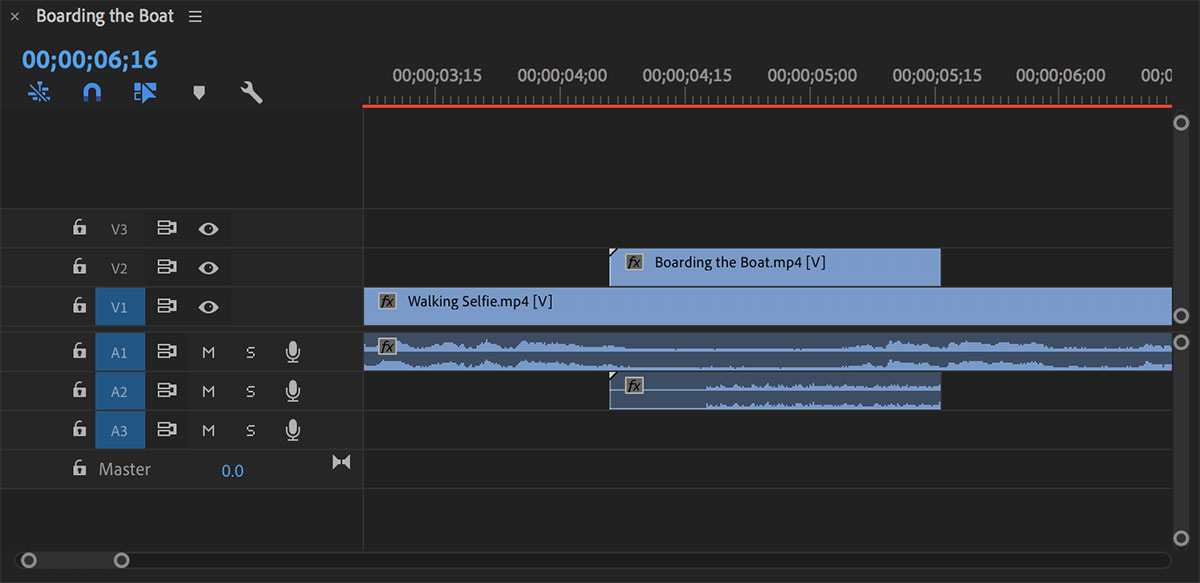 Use b-roll to add another dimension to the visuals when editing in Adobe Premiere Pro
Create smooth speed ramps & slow motion Speed ramping is an important technique for adding creative and dramatic effects. By speeding up or slowing down your footage in Adobe Premiere Pro, you can highlight actions and harness your audience’s emotions.
- The first step is to click and drag to increase track height in the timeline, which will allow you to adjust the speed of your clips in the following steps.
- Right click the fx button at the top left corner of any clip, and select Time Remapping > Speed.
- Drag the rubber band up or down to alter the speed of the entire clip.
- If you want to speed up or slow down certain portions of a clip, rather than the clip duration, you can Command + Click (macOS) or Control + Click (Windows) the rubber band to set a keyframe. Again, you can manipulate the speed before and after a keyframe by dragging the rubber band.
- In order to create a smooth speed ramp, you can split a speed keyframe in half by dragging the blue icon to left or right, which automatically generates two keyframes that mark the beginning and end of a speed change transition. You will see an angled line that shows how the speed changes over a given time interval.
- To make the transition even smoother, click on the white bar on top of the angled line. A blue curve control appears. Click and drag either of the blue handles to rotate the line and make an S-shaped curve, which allows the speed change to ease in and ease out.
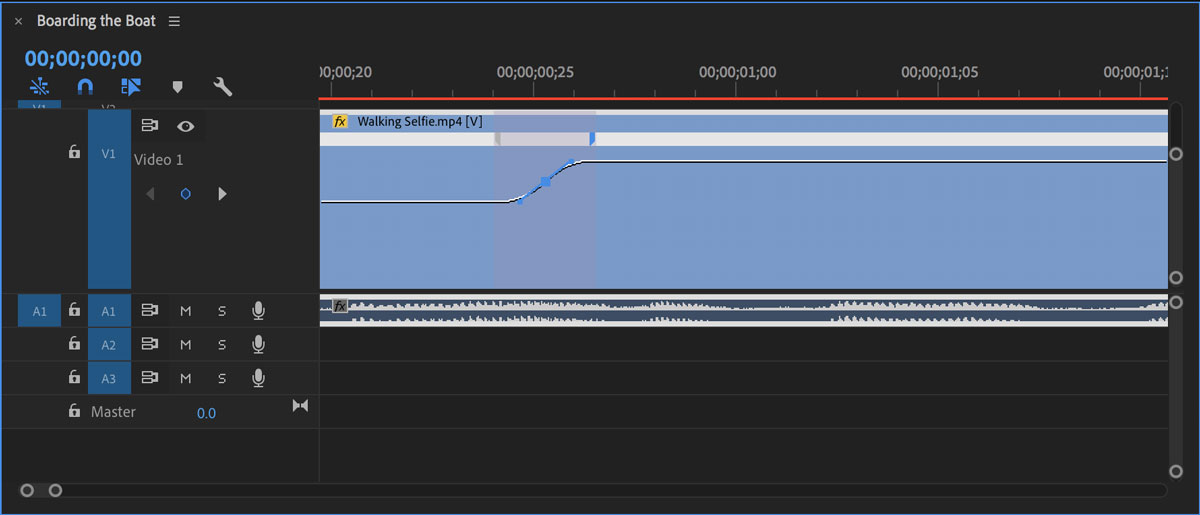 Create smooth speed ramps when editing in Adobe Premiere Pro
Crossfade audio tracks To avoid any abrupt cuts at the beginning or end of your audio, you can add a simple audio transition between two adjacent audio clips. To do so, you have to navigate to the Effects panel, and select Audio Transitions > Crossfade > Constant Power. Click and drag the selected effect to the junction between two audio clips. You can adjust the duration of the transition effect by dragging the handle.
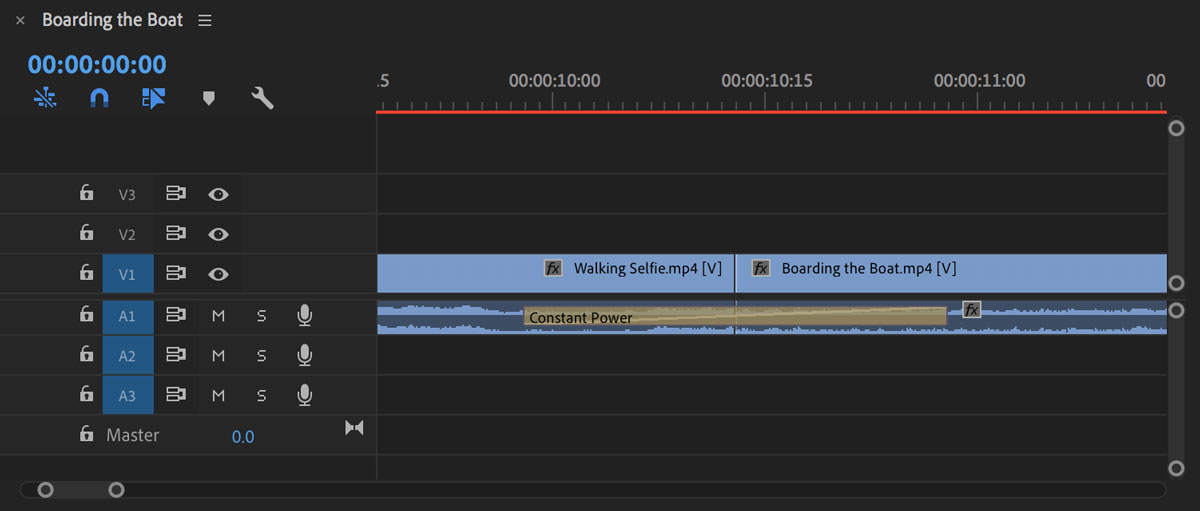 Crossfade audio tracks when editing in Adobe Premiere Pro
Save 60% on Adobe Creative Cloud Sign up for Adobe Creative Cloud and you’ll save 60%, plus you’ll have access to Adobe Premiere Pro and 20+ other apps. Learn more at adobe.com/students.


