
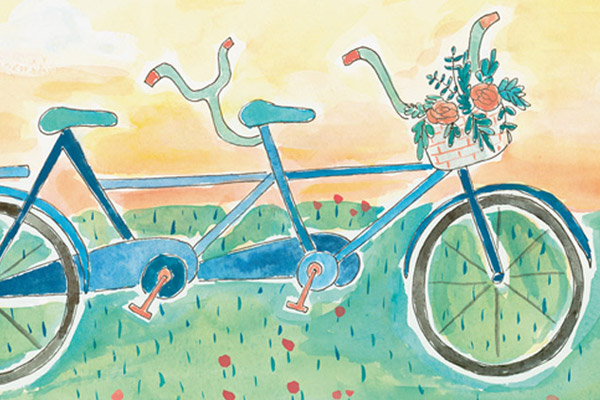

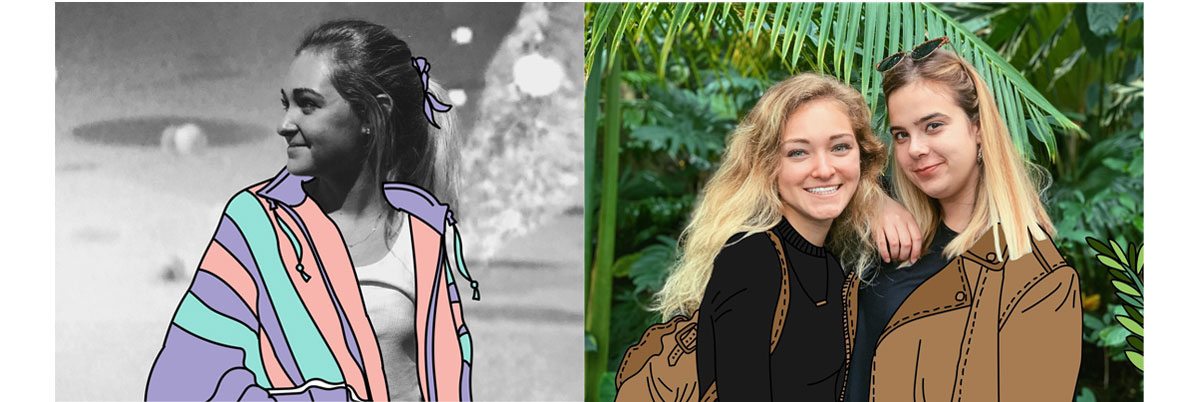
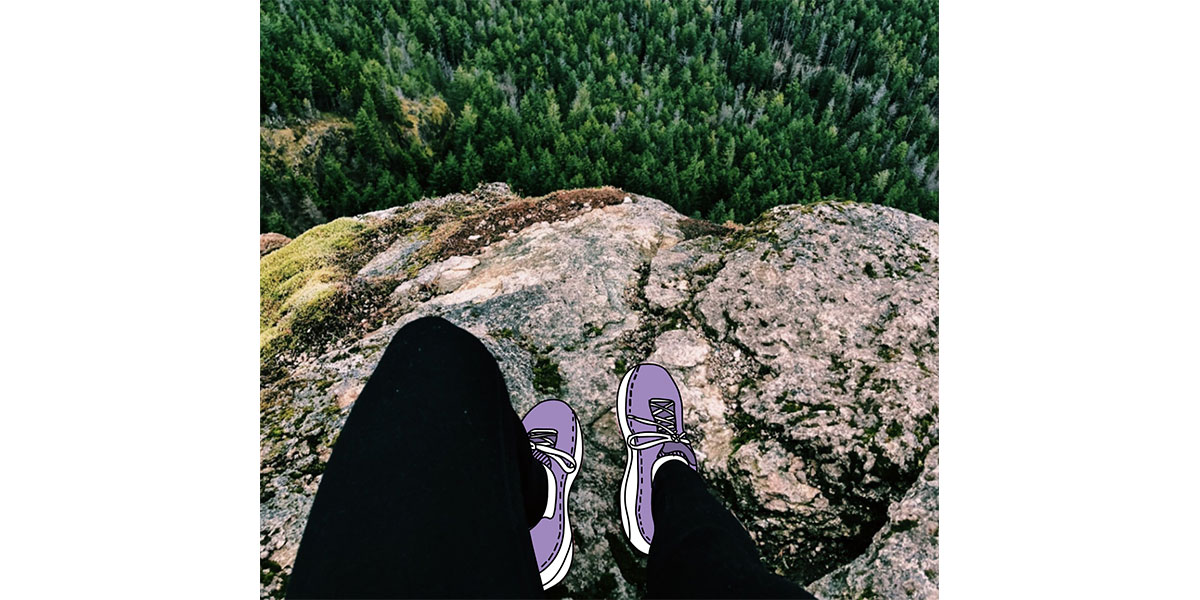
Drawing on top of photographs is a fun way to add some multimedia artwork to your Instagram feed. Using Adobe Illustrator, you can doodle accessories and objects to create a post that’s both creative and fun. One of my favorite ways to bring an Instagram photo from basic to exciting is to draw in some accessories. Sometimes, I draw entirely new clothing onto myself, like adding a pastel vintage jacket in the first image you see below. Other times, I draw over existing pieces and simply change the color or texture. In the second photo below, for example, my friend and I were wearing all black, but I gave the backpack and jacket a tan leather color to allow them to pop.
Adding doodle elements on top of a photo is easy with Adobe Illustrator’s live paint bucket tool, even if you aren’t an expert! This tutorial will work with any photo and illustration idea you have, so spend some time on Pinterest looking for inspiration, grab your picture, and let’s get started.
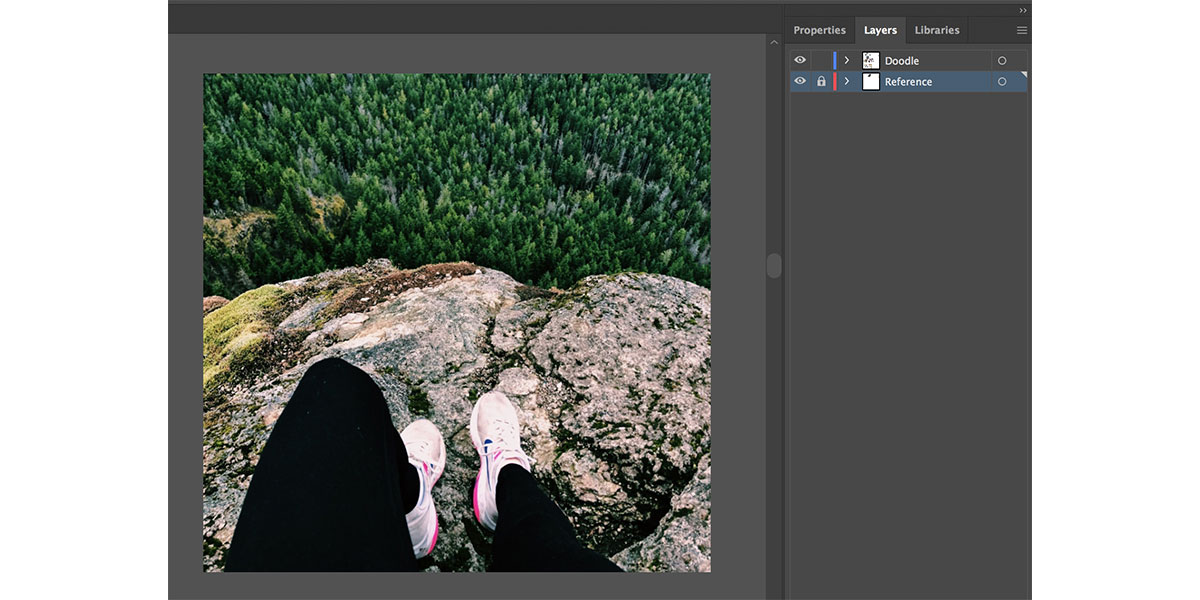
- Open your photo in Illustrator. Then, create two layers: one on the bottom, with your image, and one above, for the doodles.
To make it easier to draw your added elements, lock the bottom layer in place by pressing the lock icon.
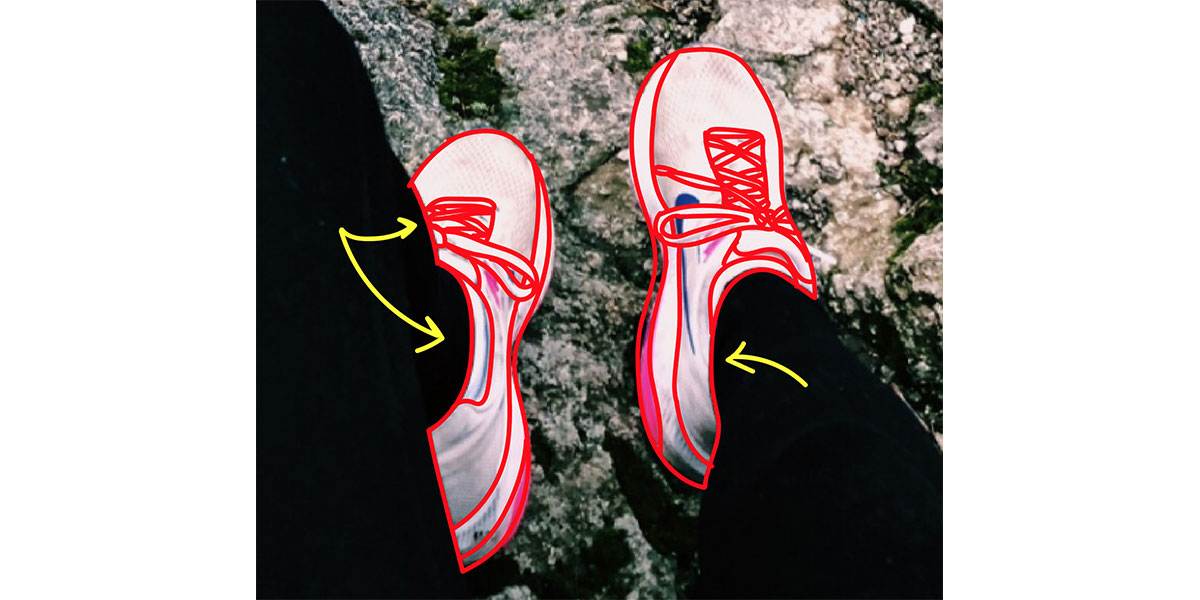
- Draw the added elements using the paintbrush tool.
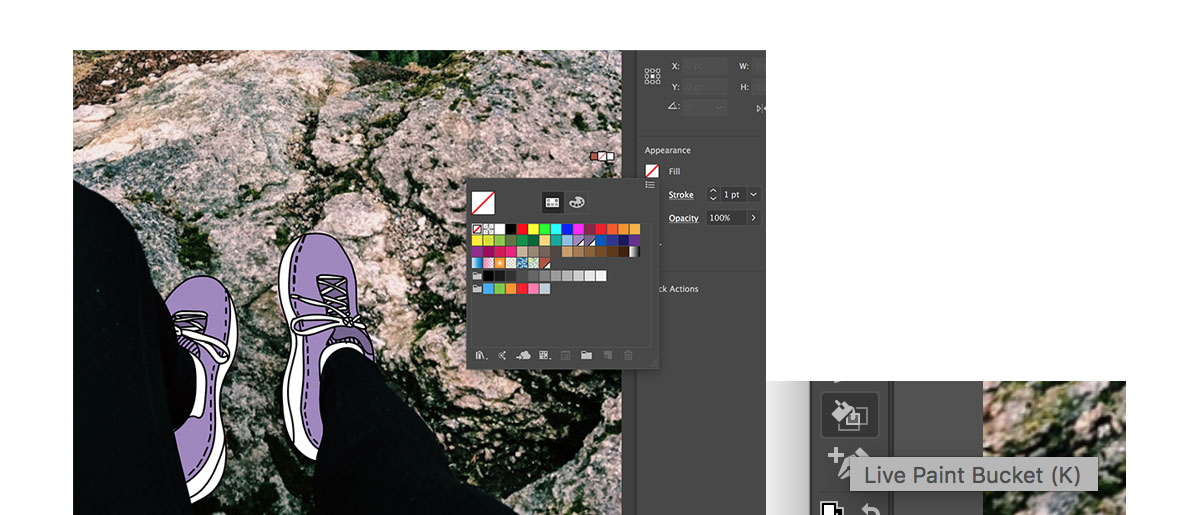
You can use any color you would like, since you can always change it later. (I like to use a red paintbrush at 0.5 thickness to make it easiest to see my lines.) Be sure to close off any gaps in the outline, such as the ones indicated with yellow arrows. When you begin filling the areas with color, you will only be able to paint in closed shapes.
- Use the live paint bucket tool to fill in the outlines.
Highlight your lines, select the Live Paint Bucket from your toolbar, and click inside one of the shapes to begin.
You might find that your gaps are either too big or too small to create the desired groups. Feel free to edit your lines using the white arrow or direct selection tool (which you can switch to, easily, by pressing “a” on the keyboard). You can draw in new lines as well and add them to the paint by going to Object > Live Paint > Make.
If you run into issues with this step, more detailed instructions for using live paint groups can be found here.
- Export your photo as a .jpg or .png and you’re done!
If you opened the photo in illustrator first, it should already be on an artboard. With your artboard selected, go to File > Save as… and select .jpg or .png.
If you imported the image into an existing illustrator file, you might have to draw a new artboard with the dimensions of your photo. Click the artboard tool in the toolbar, draw a rectangle that borders your image, and then go to File > Save as… and select .jpg or .png.

If you liked painting in illustrator, there are a lot of ways to customize your brushes to create more authentic drawing effects. Discover the different brushes in this quick video. Are you a current student? See how you can save up to 60%.


