
No scanner on hand? You can take a picture of any form, book page, or document with your phone and make your picture look like you scanned it by using Photoshop. There seem to be a lot of times in life when I curse my college apartment for not having a scanner. Maybe I have to include a book passage in a paper I’m writing or presentation I’m creating. Maybe I’m hoping to send a document for my workplace without walking all the way to the library. Maybe I need to make a copy of a sheet of paper. Whatever the reason, I’ve gotten pretty good at fake-scanning things using only my iPhone camera and a complicated list of Photoshop commands—and I will now bestow that knowledge upon you. How to Make a Document or Picture Look Scanned
- Take a picture of the page and open it in Photoshop.
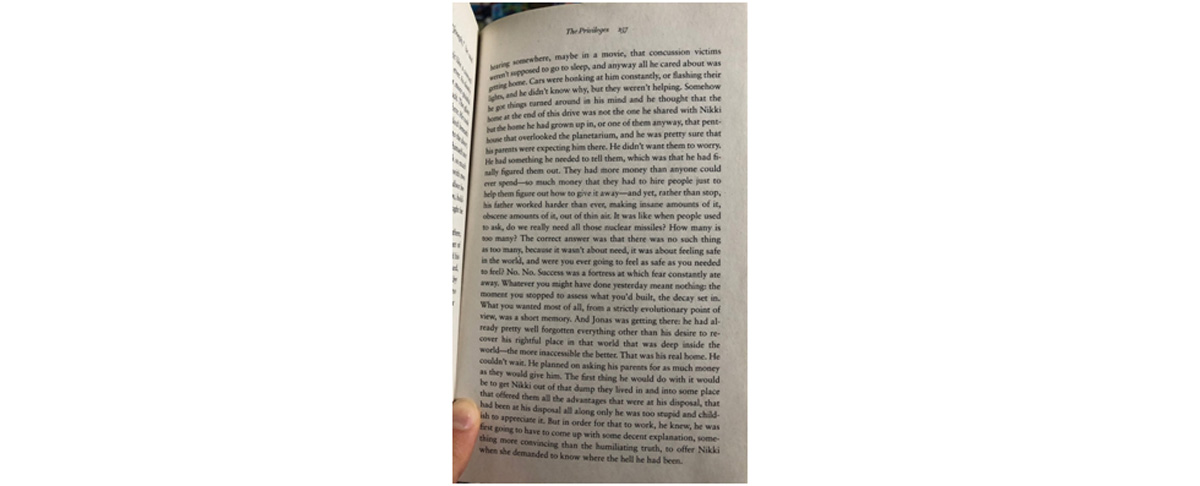
Any picture will work, but this will be far easier for you if your paper is flat and the lighting is decent. For this tutorial, I’m using a page from the book The Privileges by Jonathan Dee, held as flat as I could do with one hand.
- Use the levels panel to give it scan-worthy contrast.
This is where the magic happens! Click command + L (ctrl + L on a PC) or go to Image > Adjustments > Levels. You should see a graph of the light in the image. A “hill” on the left shows how much black is in the image while a hill on the right shows how much white is in the image. (Pictures of paper usually have way more white.)

- Use perspective warp and rotation tools to make the document flat.
If you took a tilted image like I did, you’ll want to make the document look more flat. Go to Edit > Perspective warp. Draw a box over the part of your scan that contains the document information and click enter. (If your image is slanted, this might not be a perfect rectangle!) Then, drag the corners until it looks more flat.
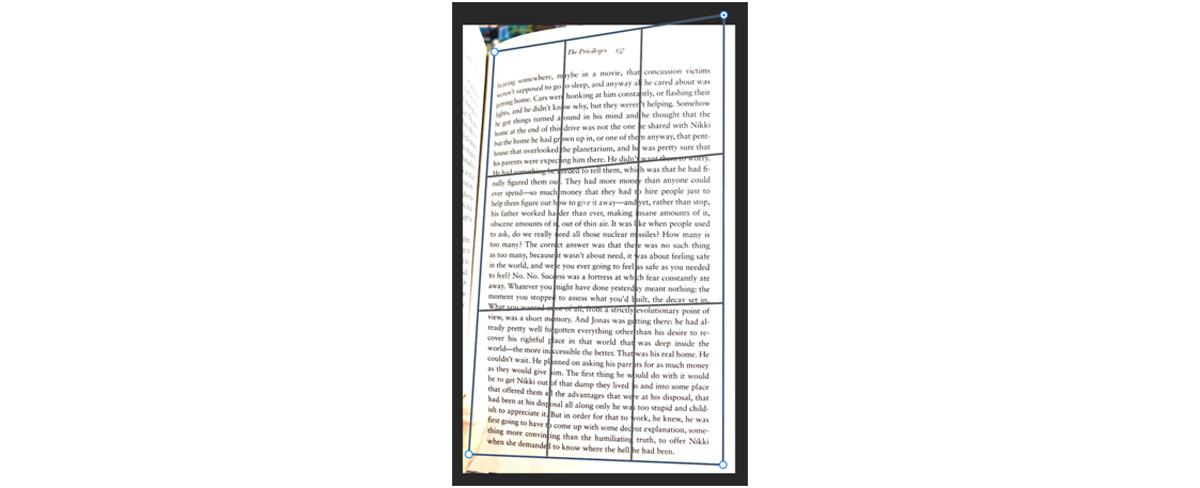 Draw a box over the area that contains your document information. If your image is slanted, this might not be a perfect rectangle!
 - Save the file as a .pdf or .jpeg.
For most documentation-type files, you’ll want a .pdf. For an image file, save as a .jpeg. And you’re done!
 It’s not perfectly straight, since I was holding the book open with one hand, but it does look like a scan!
Using a similar technique, you can edit your drawings and learn how to digitize handwriting samples in Photoshop. Are you a current student? See how you can save over 60%.


