

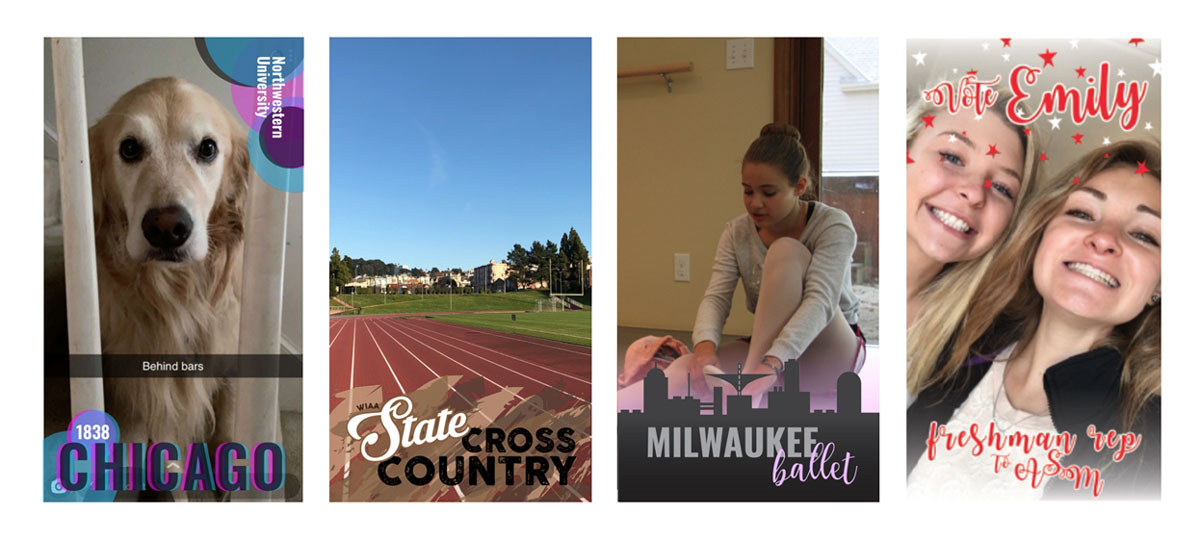
Anyone in the world can upload a filter to Snapchat, which makes it easy to make a customizable frame for your hometown, school, or even a private event like a graduation party. Swiping through Snapchat filters, you’ve probably noticed how many filters exist in any given location. Overlaying your selfie, you can add a frame that signifies the town you are in, the school you are closest to, or an upcoming holiday. The reason there are so many filters is because they’re crowd-sourced. Snapchat allows any designer to add their own filters to the app. With only a 48-hour approval process, you can have a filter on the app for anyone to use within a couple days. Ready to get started?
- Brainstorm a good idea. It might help to draw it out first! There are two types of filters on Snapchat: private and public. Private filters are often created for personal events: birthday parties, fundraising events, anniversaries. A designer can upload whatever they would like and pay for it to be published for a temporary amount of time. Public filters are meant to be used by the larger community. You might see ones for local areas, like parks and landmarks, or just general locations like a town or city. Public filters are free, but Snapchat is pickier about putting them on the app. If there are already too many filters for a specific location, it’s harder to get a new one published. Public filters also can’t include logos or any brand-oriented iconography. Take some time to think about what filter you would like to create. Imagine what region it would cover, how long it would be active for, and whether you would like it to be public or private. Then, draw up a plan for what you would like it to look like.
- Create a document with a height of 1920 px and a width of 1080 px. Once your idea is ready to go, it’s time to make it digital. You can make a filter in any program that allows you to export a .png, but Adobe Photoshop and Illustrator are most popular. As you make a new document, make sure you set the height as 1920 px and width as 1080 px.
- Design your filter.
Design away! Most filters use the bottom or top fourth of the screen for the design. If you are putting design elements on the top and bottom, be sure not to take up too much space. Remember, people sending Snapchats will not want the filter to cover up their images.
 Most Snapchat filters use either the top or bottom of the frame for the design.
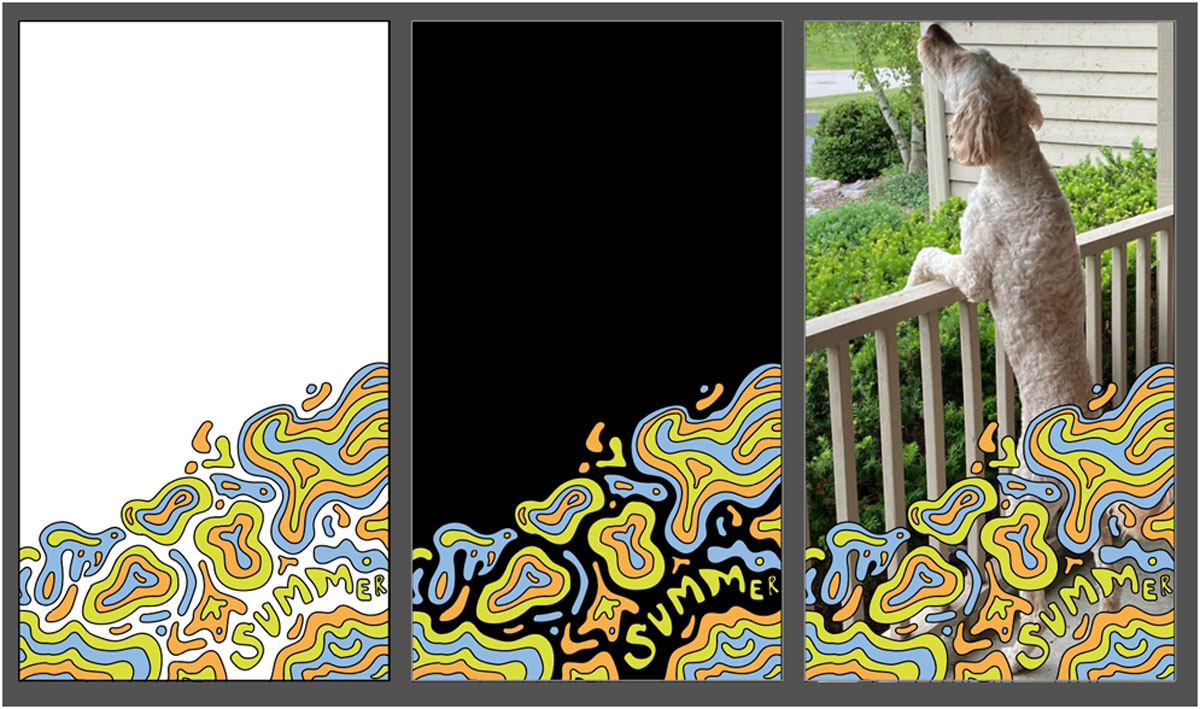 Test your filter on a variety of backgrounds to make sure it still looks legible.
 - Export the filter as a web-optimized, transparent .png
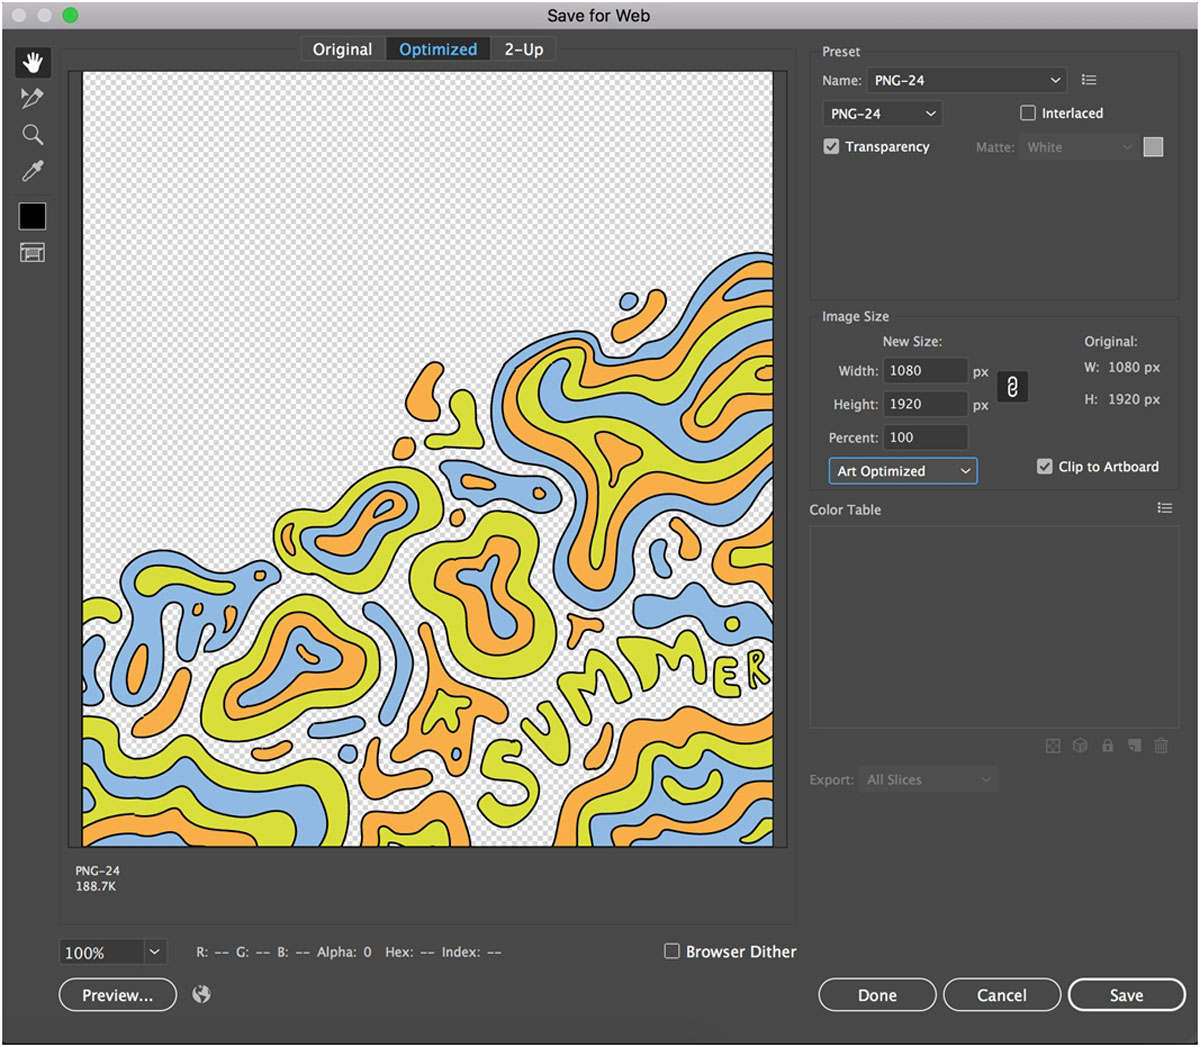
If you’re happy with your design, you can export your file. On either Photoshop or Illustrator, go to File > Export > Save for web (legacy). Use the PNG-24 settings with the transparency checkbox clicked. Make sure you see a checkerboard pattern in the background, which indicates your image will include transparency. The file cannot be larger than 300 KB, but if you used the right dimensions, this should not be a problem.
- Upload to Snapchat! The final step is to log onto Snapchat’s website and upload your filter. You’ll have to input a location, choose a time limit, and write a brief description of why your filter should be published. Within a few days, Snapchat should email you back explaining whether or not they made your filter live. If at first you don’t succeed, don’t give up—now that you know how to make your own, you can do it again and again.
If you’re a fan of making creativity pop on social media, you might enjoy these ideas for ways to upgrade your instagram posts. Are you a current student? See how you can save up to 60%.


