

The fast-paced, clean animation style of today’s explainer videos relies on complex, animated shapes that appear to build themselves. If you’ve ever watched a Vox video, scrolled through Snapchat Discover Stories, or even sat through the commercials on TV, you’ve probably seen pop-up shapes. They appear on-screen not by walking in from the right or left, but by building themselves in a snappy, fluid fashion like a pop-up book opening. These sorts of transitions might look hard to do, but as long as you understand the nature of keyframes in After Effects, they’re quite simple. And if you don’t? Well, that’s what this vector animation tutorial is for! Read on to find out how to create your own animated shapes.

- Break your shape apart in your head.
Think about the shape you’re going to build. (For the sake of this tutorial, I’m doing a simplistic government-style building, with a dome and columns.) In your head, think about the shapes it takes to make it.
 My finished shape (left) and all of the pieces that it took to create (right)
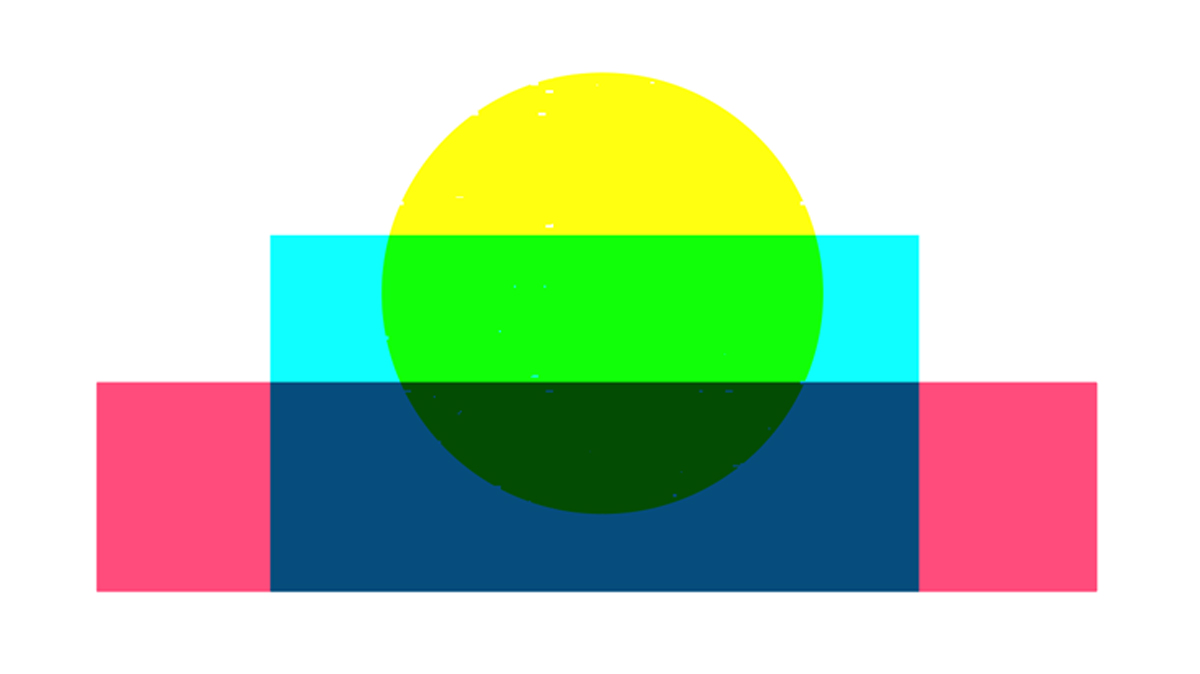 A helpful visual for how overlapping shapes can create a more complex shape.
 - Build the basic components.
Create your After Effects file and sequence. You can use absolutely anything for the size and length—this whole effect should only take a few seconds on the timeline to animate in and out.
Then, create your shape layers by clicking the rectangle or circle tools in the toolbar and just dragging on the screen. Before you draw a new shape, make sure you don’t have any of your existing layers selected or After Effects will make an annoying “shape group.”
Arrange them to make your object. Make sure to arrange the layers so that the objects on top are above the ones below.
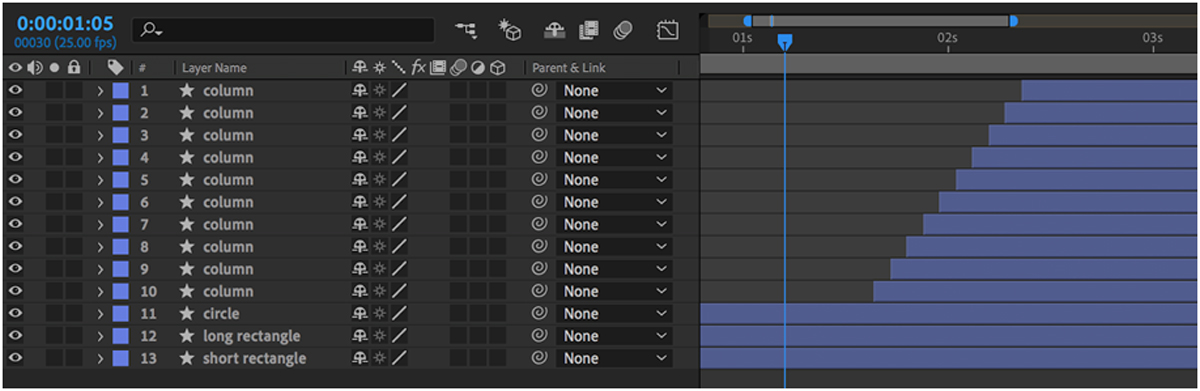 All of my shapes in the After Effects timeline. That was two light gray rectangles, one light gray circle, and ten dark gray rectangles.
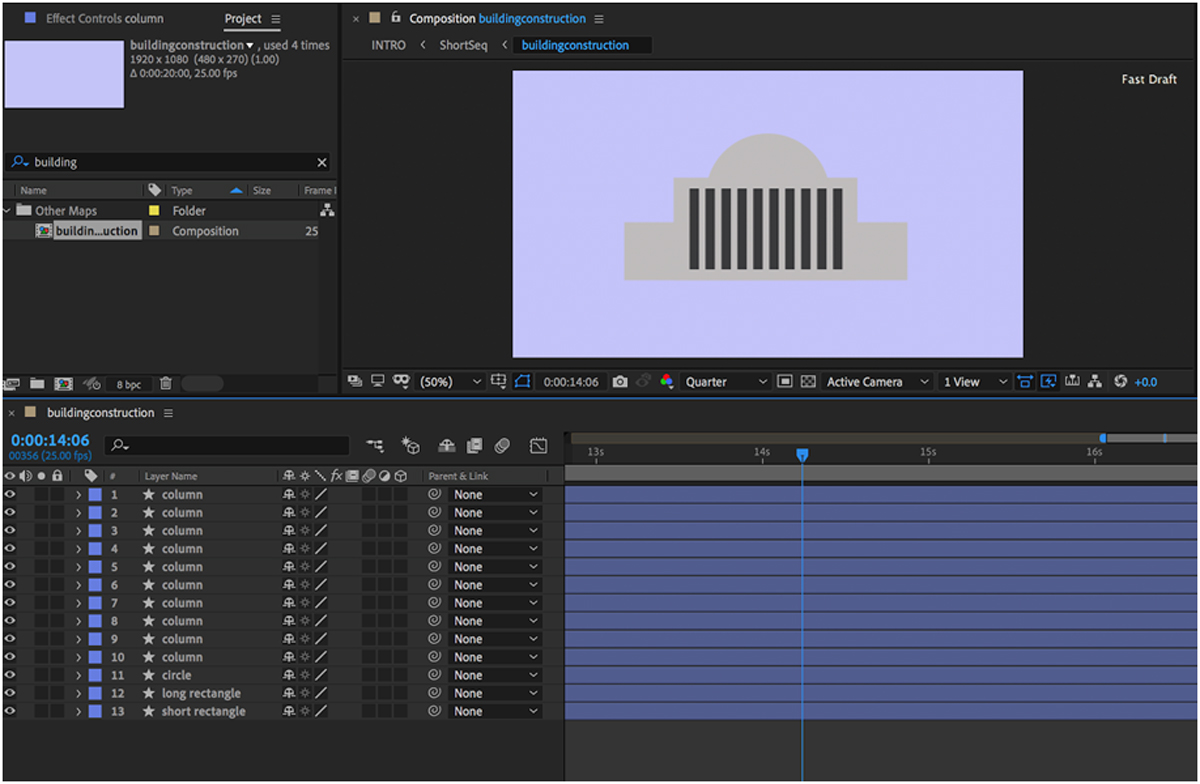 My entire After Effects window. Not sure why I chose lilac as my background color.
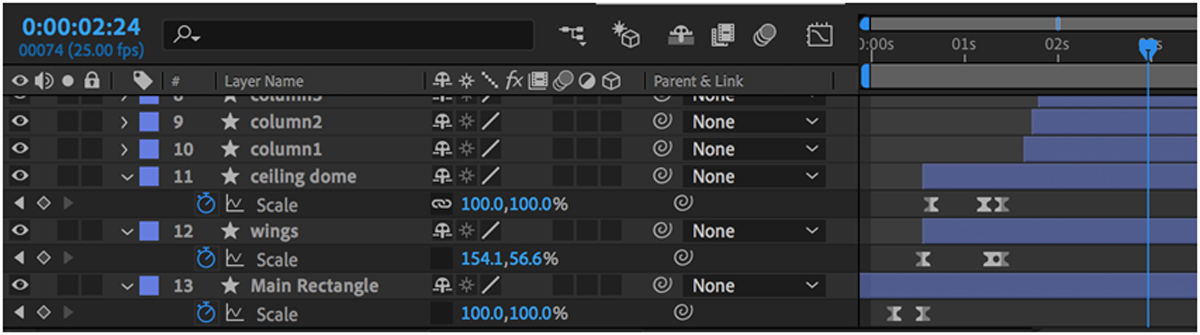
 - Set your ending keyframes first. Before we begin, let’s set a keyframe for all of these objects so that they come back to this location at the end of the vector animation. Move your playhead to three seconds (or whenever you want the shapes to be done moving.) Highlight all of your layers by pressing command/ctrl+A. On one of them, “expand” the layer view so that you can see the transform options. Press the stopwatch beside “position”. Press the stopwatch beside “scale”.
- Shape by shape, animate the objects into the frame.
This is where it gets a bit complicated, but we’re going to move layer by layer. If it helps to hide all of the other layers so you can only see one at a time, press the eyeball on our other layers to hide or show it temporarily.
Start with your first object—the center of your image. For me, that was my middle rectangle. Move your playbar to time 0, the start of the video.
Beside the “scale,” you’ll see a link icon. This means that the object will always scale proportionately–but for pop-up shapes, we don’t want that. Click the scale and turn it off.
Then, type “0” for the second scale value. You will notice that the “height” of your shape becomes 0. It will just be a line, floating. If you’ve already set your end keyframe, After Effects will drop one here by default for you.
 The scale, before and after.
 - Adjust timing and keyframe type.
Once you’ve completed every shape, drag the “end” keyframe so that the first layer ends soonest, followed by the next, etc. Play the video back and see which elements need to be faster or slower.
Are you a current student? See how you can save over 60%.


