


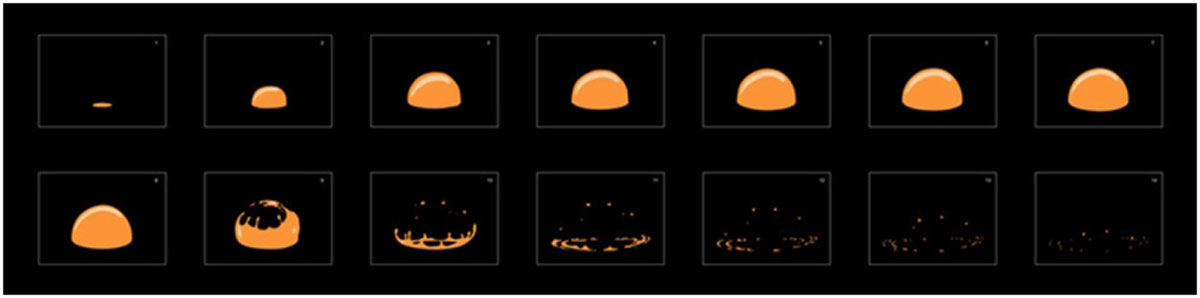
By using the timeline window in Photoshop, you can create animated looping GIFs out of any image. Knowing how to make your own GIFs means you can turn any funny video into a meme-worthy reaction in the groupchat, but it’s also a useful skill for school and work projects. A lot of motion designers use GIFs on their online portfolios because they load faster than videos and play automatically. GIFs are also great visuals for slideshow presentations because they add endless motion to an otherwise static slide. Whether you’re making a GIF for school, a job, or just for fun, learning how to add motion is an easy way to take artwork to the next level. Let’s start by doing a simple frame-by-frame animation and turning it into a looping GIF using Adobe Photoshop. For this example, I’ll be using these animation frames I found on Adobe Stock. However, you can make a GIF in Photoshop with whatever images you would like.
(If you’re interested in doing more frame-by-frame animations, you might enjoy Adobe Animate.)
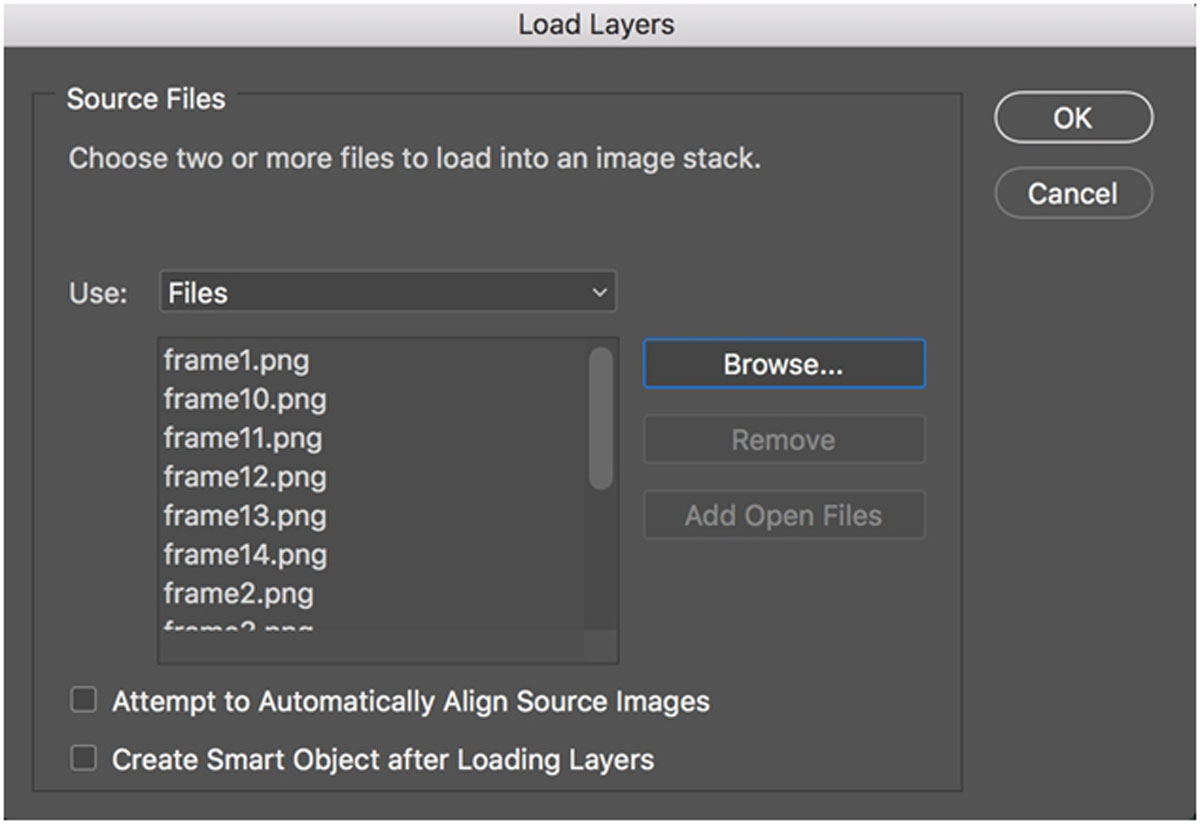
- Open your frames as layers in a Photoshop file.
My favorite method is to prepare my frames in another program, like Adobe Illustrator. Then, I import them into Photoshop by going to File > Load Files into stack. Add all of the frames and press “OK.”
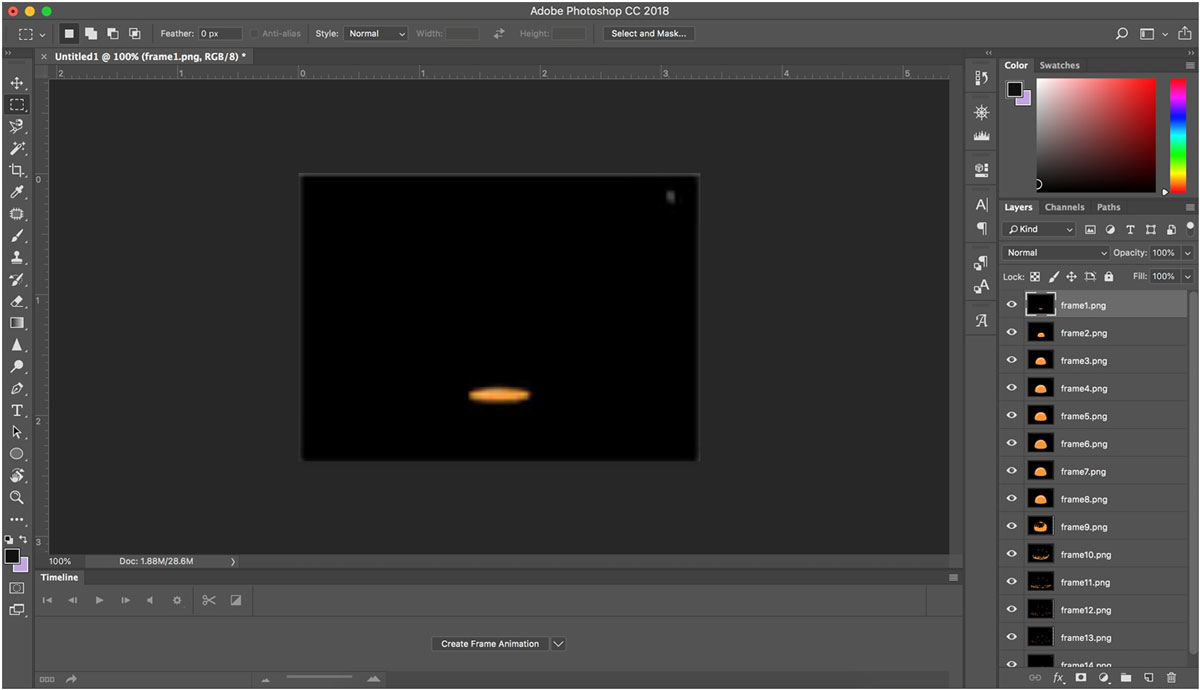
- Open the timeline window and click “Create Frame Animation.”
With your layers open in Photoshop, go to Window > Timeline. Then click “create frame animation.”
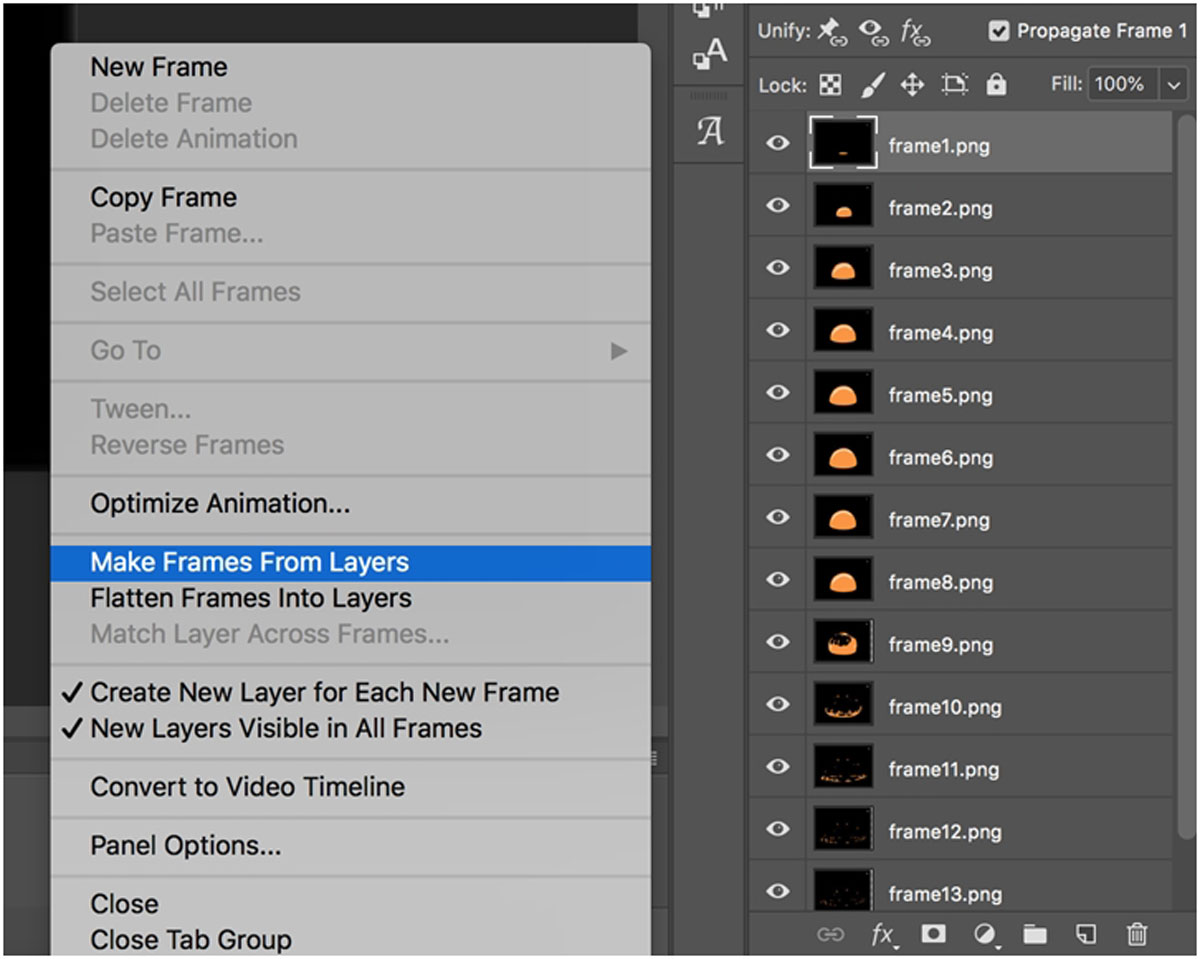
- Select “make frames from layers” from the menu.
This will allow you to take your layers and separate them into frames within the timeline window. You can play around with the order of the frames by dragging them. The trash can icon can delete a frame and the sticky note icon can add a new one.

- Watch your GIF! Preview the animation by either pressing play on the timeline or using the spacebar on your computer. Once you are happy with the final result, go to File > Export > Save for Web (Legacy), and make sure you save as a GIF.
Want a more in-depth tutorial on how to use Photoshop to make animations? Discover more projects you can create using the timeline tool. Are you a current student? See how you can save up to 60%.


