

It’s easy to create your own frame-by-frame animation using Adobe After Effects’ brush tool. If you’ve ever looked through a flipbook, you have seen that images with slight differences can create the overall illusion of motion. You can use this same technique of frame-by-frame drawing to create your own animations in Adobe After Effects. It is a tedious process, but luckily, it is not difficult! This basic tutorial will teach you the basic method, which can be applied to whatever illustrations you would like.
 An example of animation frames.
(To learn how you can apply this trick to TikTok videos, click here. Or, want to skip the organic drawing and just trace over the frames of a video? We have a tutorial for that, too.)
- Create a new composition with a solid color layer. We are going to use this solid color as our background. Go to Layer > New > Solid to create one with a color of your choice.
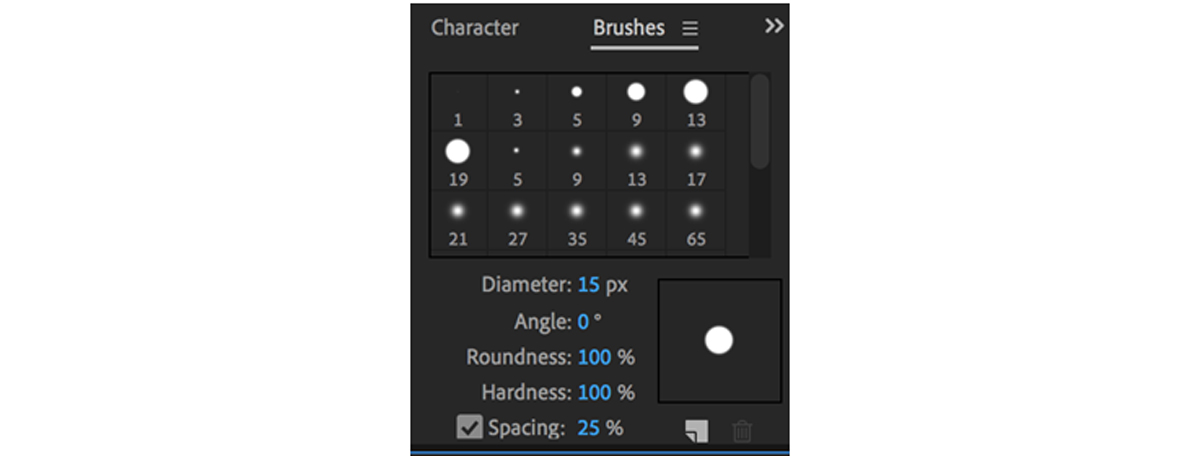
- Double-click the brush tool (
 ) to create a paint layer.
Once this is created, you can select your paintbrush as well.
) to create a paint layer.
Once this is created, you can select your paintbrush as well.
- Set the frame duration as a “custom” of 2f.
The duration indicates how many frames of motion your paint strokes will be on-screen for. 2 is a convenient duration because it allows your frames to overlap for a second—you will see how this works after the next couple steps.

- Draw your first frame.
For this example, I am going to draw a curly, moving doodle. The first frame might be boring, but the animation will look clean if it starts out small!

- Use the command key and right arrow key to advance to the next frame.
Do this once to move one frame forward. Nothing will change, but draw your second frame on top of the first one. You’ll want to use the same color, but for the sake of this tutorial, I used white to show my first stroke and black to show the second.

- Repeat this step until your animation is complete.
When you press command+right arrow this time, you should see only your second brushstroke. Add your third one on top of this and repeat the step (Draw your frame, advance one frame forward. Draw, advance. Draw, advance.) until your animation reaches its final frame.
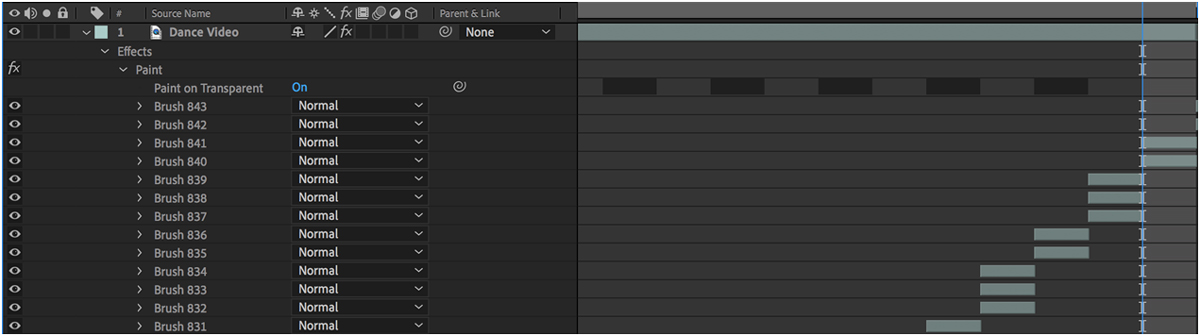
You can move backwards in the timeline by pressing command+left arrow. To delete a brushstroke or change its duration, click the down arrow beside “effects” in your timeline window. Open the paint layer. You should be able to see all of the brushstrokes you have created, each spanning the number of frames it occupies onscreen. Scroll until you find the brush you would like to delete or modify. You can delete a brush using your computer’s delete key or modify the length of a brush by dragging the beginning and endpoints back and forth in the timeline.
- Click back into the main composition to view your animation.
Close the paint layer by going back to your original composition. The tabs usually appear along the top of your project window. Drag the playhead to the beginning and press the spacebar to watch your animation from beginning to end.

If you enjoyed this tutorial, it’s only the beginning of what you can do using Adobe After Effects’ drawing tools! Discover everything that you can do with brushes, stamps, and erasers. Are you a current student? See how you can save up to 60%.


