You don’t have to have a Polaroid or film camera to create photos that have that cool old-fashioned, vintage look – a.k.a. fake Polaroids. With the ever-advancing quality of cameras on our phones, it’s almost too easy to get a good picture. As a backlash to this ease of technology, it’s become fashionable in a vintage sort of way to have low-quality photos. We see blurry, grainy, or dark photos and we think that maybe the people in the images were having so much fun that they didn’t have time to find the proper exposure, locate the right lighting, or take a second shot. There’s a certain beauty in what might otherwise be considered “bad photos,” especially right now on Instagram. There’s been a resurgence of Polaroid photography, grain filters that mock the look of film, and 80s-style digital camera apps like Huji. Of course, taking a photo that looks effortlessly cool is trickier than you might think. Our iPhone cameras are built with auto-focus that makes it almost impossible to get a blurry image—and even if you manipulate the focus, it’s still tough to nail that perfect just-under-the-surface blur of an old-fashioned polaroid.
 There are many different types of Polaroid cameras, so this tutorial will only show you the stereotypical edit. If you want something different, feel free to tweak the settings!
Luckily, it’s easier to make a modern photo look old than it is to make an old photo look modern. All you have to do is drop an image into Photoshop and make a few key edits to transform any picture into a Polaroid for that blurry, grainy, authentic-feeling or faux-film image. How to Make a Picture Look Like a Polaroid Using Adobe Photoshop
- Add a fade and adjust the red, green, and blue by adjusting the image’s curves.
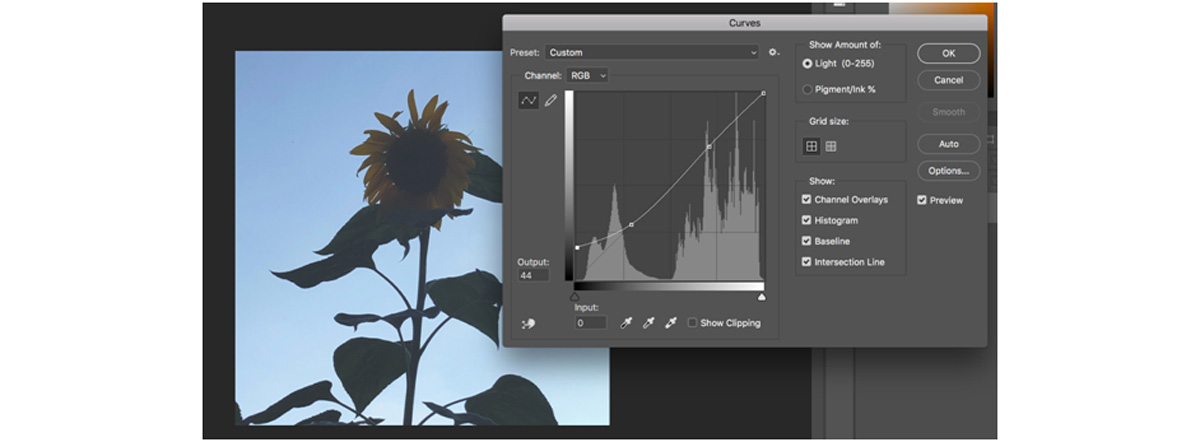
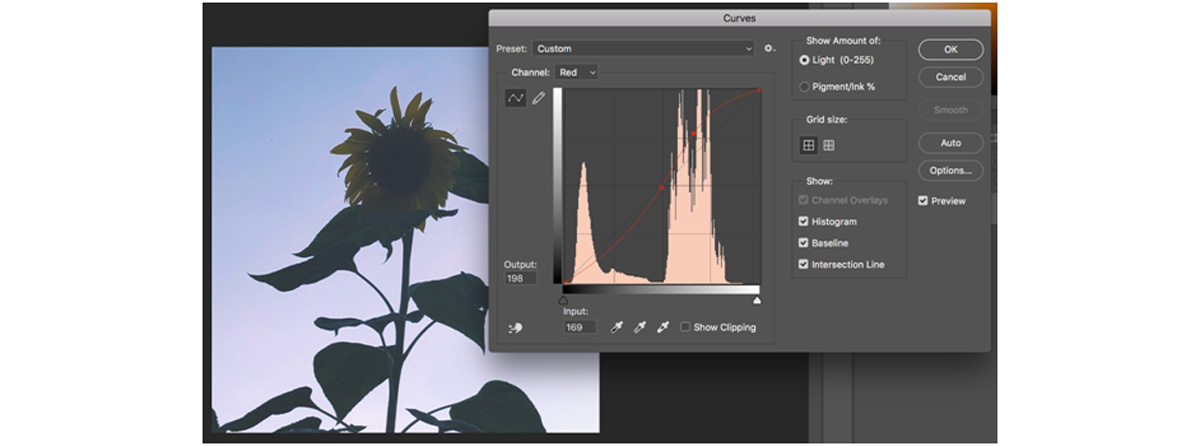
When you break it down, a Polaroid is just a specific type of film. These images are known for having a high black point, meaning that the darkest parts of the image aren’t pure black, but more faded. To manipulate the black point and adjust each of the colors, open the Curves panel in the Image > Adjustments menu. You can also press ctrl or command+M.
You can see what channel you are viewing along the top of the window. For the RGB channel, you’ll want to create a line that looks like a checkmark with a flat left side, like in this image. Click in the centerpoint of the line provided and then drag the leftmost corner upward. This will bring the black point up and “fade” the darkest parts of the image while leaving the highlights parts intact.
- Dull the image’s highlights.
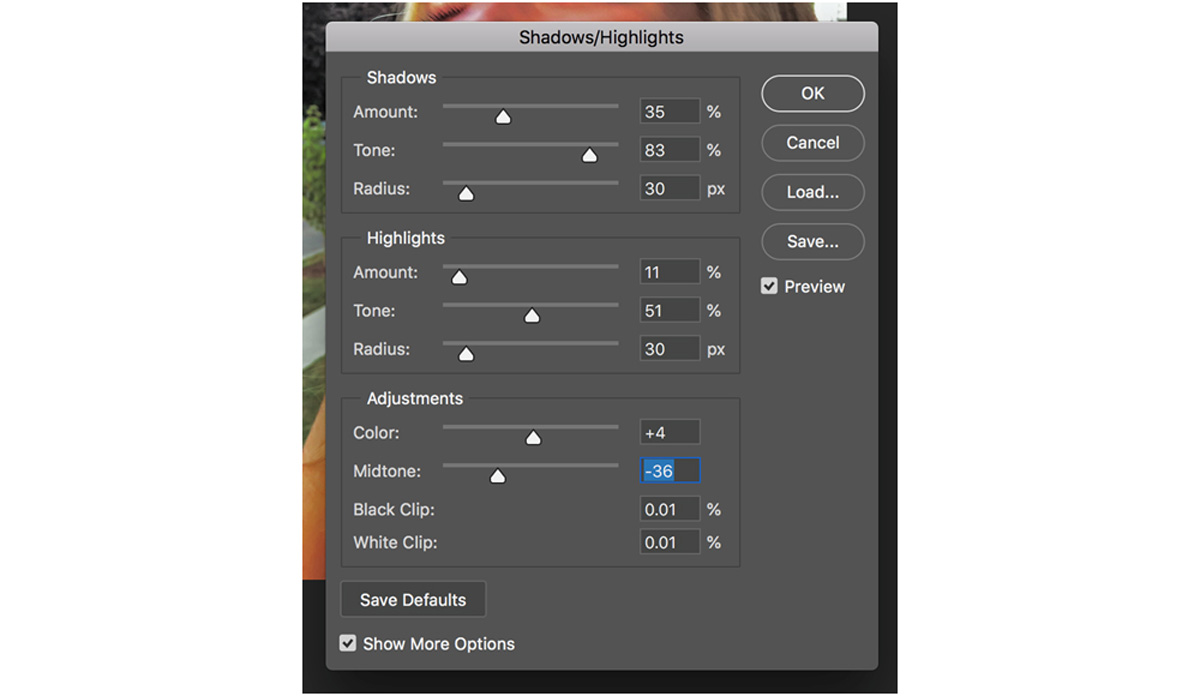
Next, we’ll want to make the brightest parts of the image more dull. Open the Shadows/Highlights window under Image > Adjustments. By default, Photoshop will edit the photo to be more properly exposed, but to get a vintage feel, you’ll have to ignore its suggestions. Make sure both of the values have at least a little “amount.” Drag the “tone” of the shadows up. Drag the “tone” of the highlights down. You can tweak the settings to your liking, but it’s okay if it looks a bit dramatic. The next few steps will help!
- Add grain.
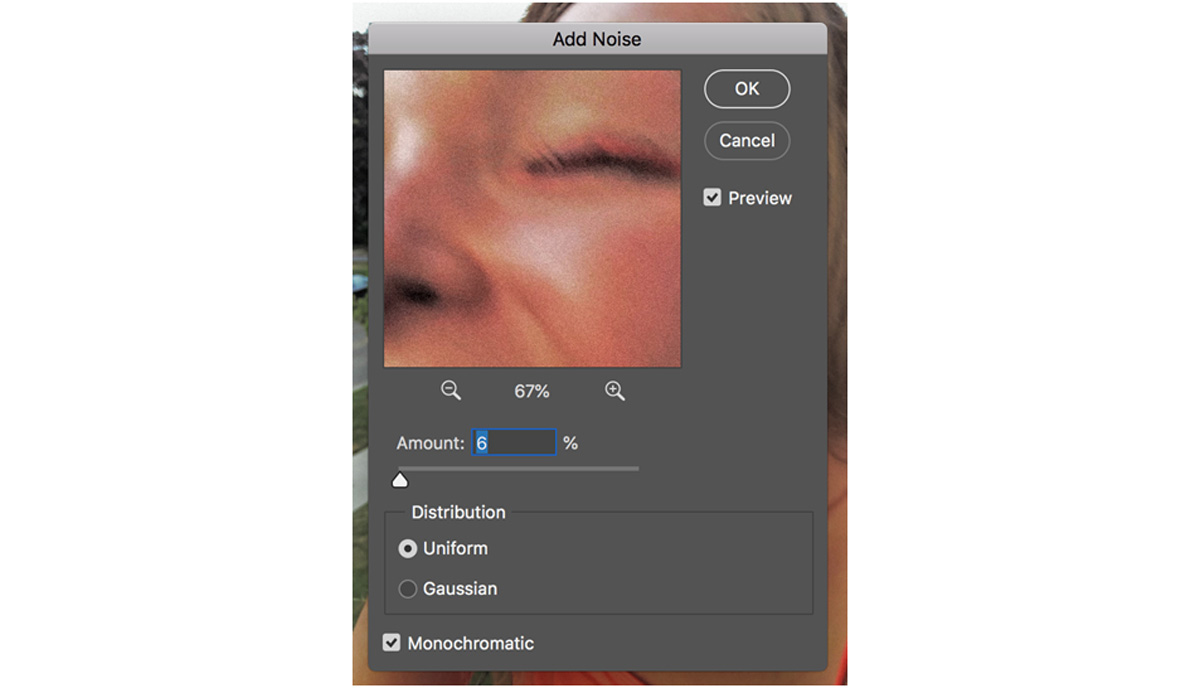
One of the most important elements of the Polaroid or film “feel” is the grain or noise in the image. While not all Polaroid or film photos have grain, it lends an old-fashioned touch to the image and can help make your edit look more authentic.
Go to Filter > Add Noise. In this box, play with the amount until it looks subtle, yet noticeable. By default, Photoshop’s grain is multicolored. If you like a more calm look, click the “monochromatic” box at the bottom.
- Optional: Add a slight blur.
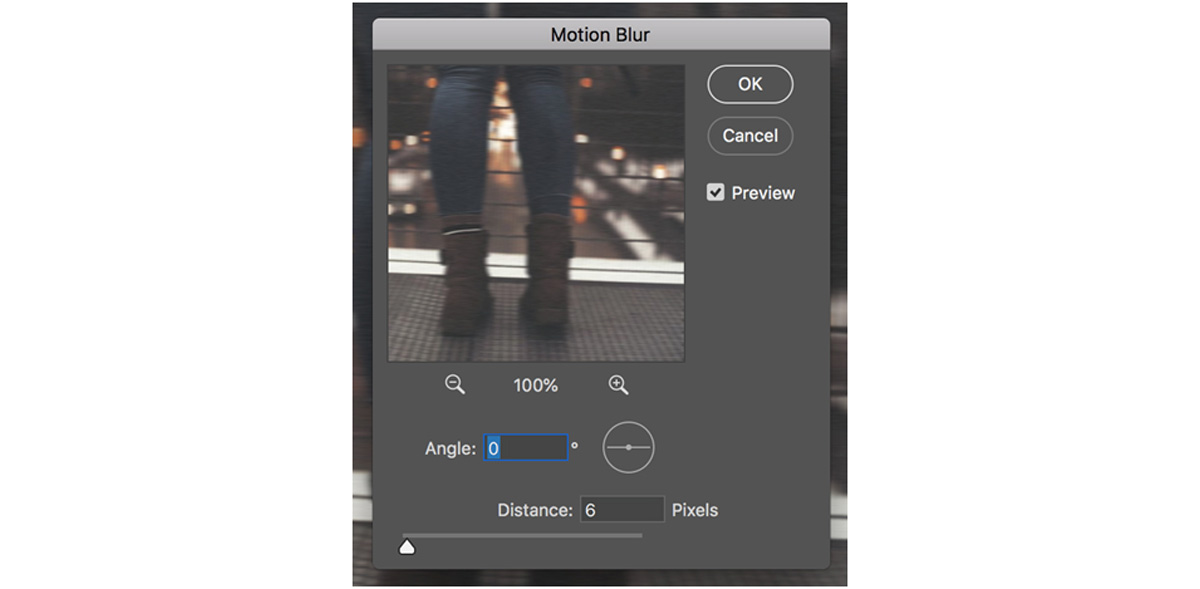
It isn’t completely necessary to edit your photos to be blurrier to make a fake Polaroid, but sometimes this can create an effortless, candid effect. Go to Filter > Motion Blur and select a low amount of blur, like 6.
- Optional: Crop into a Polaroid frame.
A Polaroid is almost square with dimensions of 3.0625 x 3.125 inches. You can crop your photo to this size in Photoshop if you would like by going to Image > Image Size and entering the numbers.
The frame of a Polaroid is 3.4 x 4.2 inches. To add the frame, go to Image > Canvas size and input the values. Then, drag your photo into the correct place within this “frame.” Create a background layer of white (go with an off-white, slightly gray, or slightly beige color for the best effect) behind your image. And there you have it! A faux polaroid.
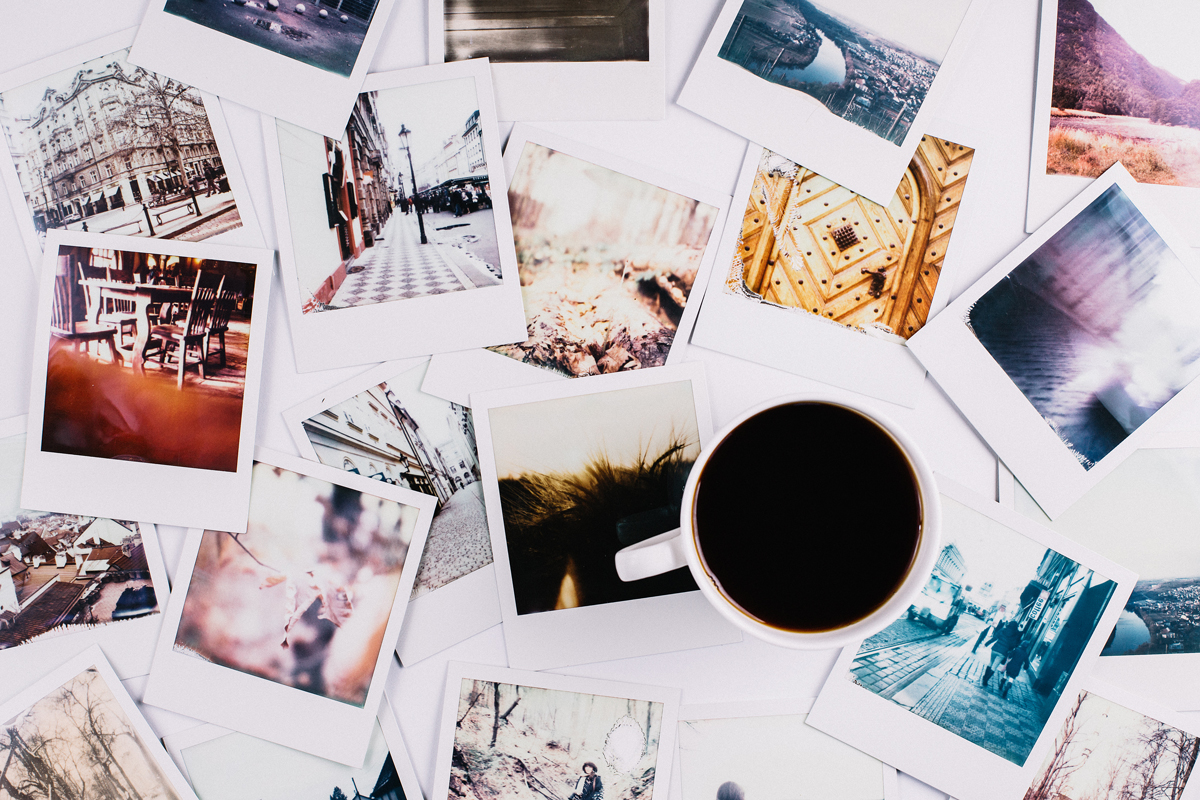
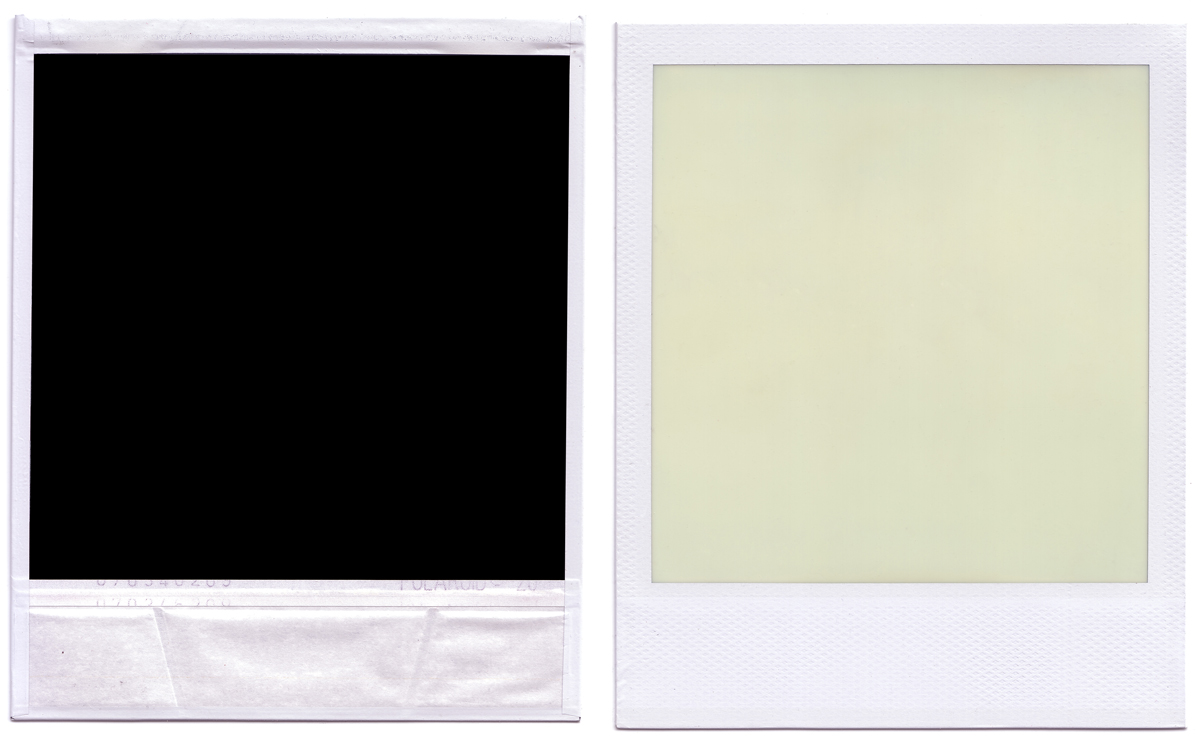
Note: If the background looks inauthentic to you, you can also grab a Polaroid frame from Google Images or any stock website! This one can be found on Adobe Stock. You can drop this into Photoshop and place your image in the square part on top.
Are you a current student? See how you can save over 60%.

