


If you’ve ever seen a digital graphic that looked like it had dimension like a physical piece of art, then you’ve seen texture overlays before! The secret weapon of many digital artists and photo editors, textures give your work a tangible feel. They can unify unmatching color grades, make lighting mistakes look intentional, and make artwork a bit more interesting—sort of like filters on Instagram. The best part? You can add a texture to your photo or other file in only a few short steps. Before we begin, think about whether your work would benefit from some added dimension. Here are some situations where you should use textures.
- You’re working with a combination of different photos and you’re afraid their colors don’t necessarily work well together. A texture, especially one with a slight color overlay, would be helpful in giving the collage more cohesion.
- You created a digital illustration, but you think it looks too simple. Textures can make digital art look more complex and professional just by adding another layer to the work.
- You’re creating a document or image that’s meant to have a retro, vintage vibe. Textures were made for this! You’re in the right place.
There are also some situations where you should not:
- You’re making a social media graphic for Instagram. Textures on top of small text can look muddy, especially when distorted by Instagram’s file optimization. Photo editing is fine, but if you have small text on a graphic, avoid texture!
- You want the finished design to look modern and clean. Textures aren’t clean; they’re gritty. For something flat and sleek, skip ‘em!
- You are animating/working with video. Go ahead and add texture to any individual video assets, but a texture can look fake if it’s applied with moving pieces underneath. (This isn’t an exceptionless rule, so go ahead and try it out to see how it looks first! But in general, videos look best when the texture matches the motion of the piece.)
How to Add Texture to Photos
- Find your texture image.
Textures are often added as layer overlays in Photoshop, though blending modes make it possible to do this in almost any Adobe software. For that reason, we’re looking for a simple .jpeg or .png to use. You can find textures online by searching on Google Images and adjusting the copyright in the settings bar. There are also a ton of nice textures on Adobe Stock. And finally, if you use textures often, you can consider buying a pack of them from a website, like Mextures.
If you don’t know what you’re looking for, just type in “photoshop textures” or “texture overlays” and choose a few that interest you. (You might end up using one or a combination of a few.) Looking for something more specific? Here are a few search terms that might make it easier to look for the texture you need.


- Drop it onto your file in Photoshop (or Illustrator and InDesign). Drag the image into your file and make sure it is on top of all other elements. Resize to fit the proportions of the document. (If you’re using Photoshop, press ctrl/command+T to use Free Transform.) You can use other Adobe programs as well, resizing the image by grabbing one corner and pulling outward.
- Change the blending mode and adjust opacity.
On your Photoshop layer, you might see a drop-down box that says “normal.” This is the blending mode! We’re going to change it to something abnormal. (For those using InDesign, Premiere, or After Effects, the blending mode can often be found in the Effects panel under Opacity. In Illustrator, it’s in a window called “appearance.”)
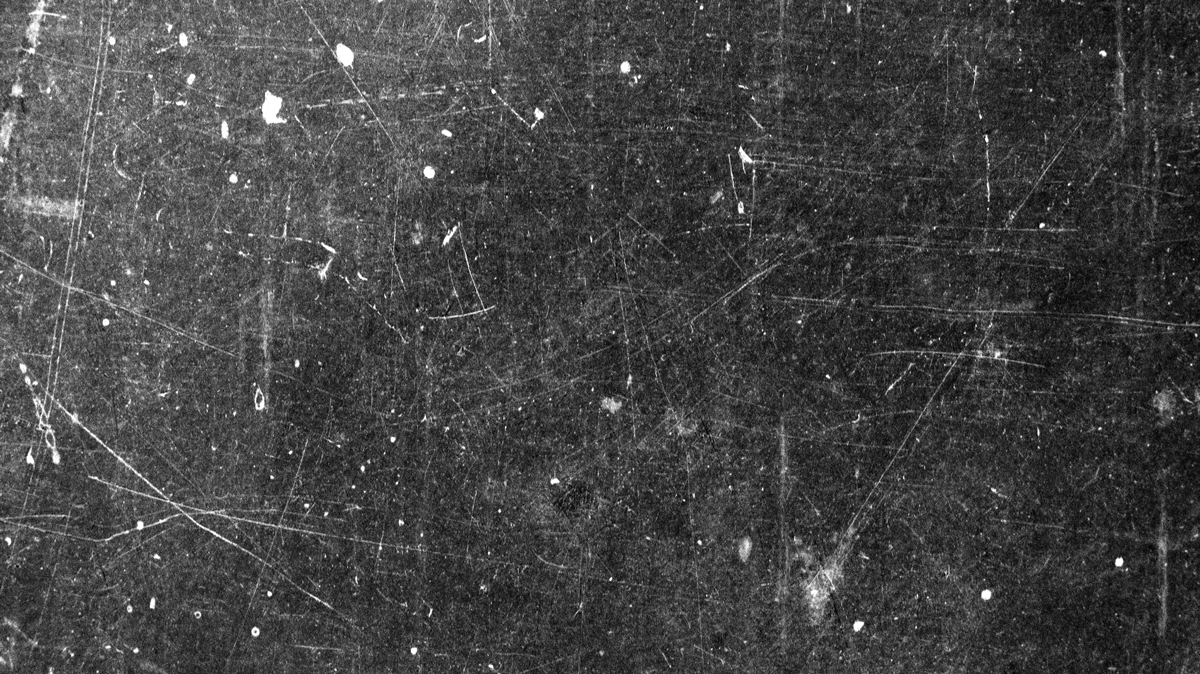
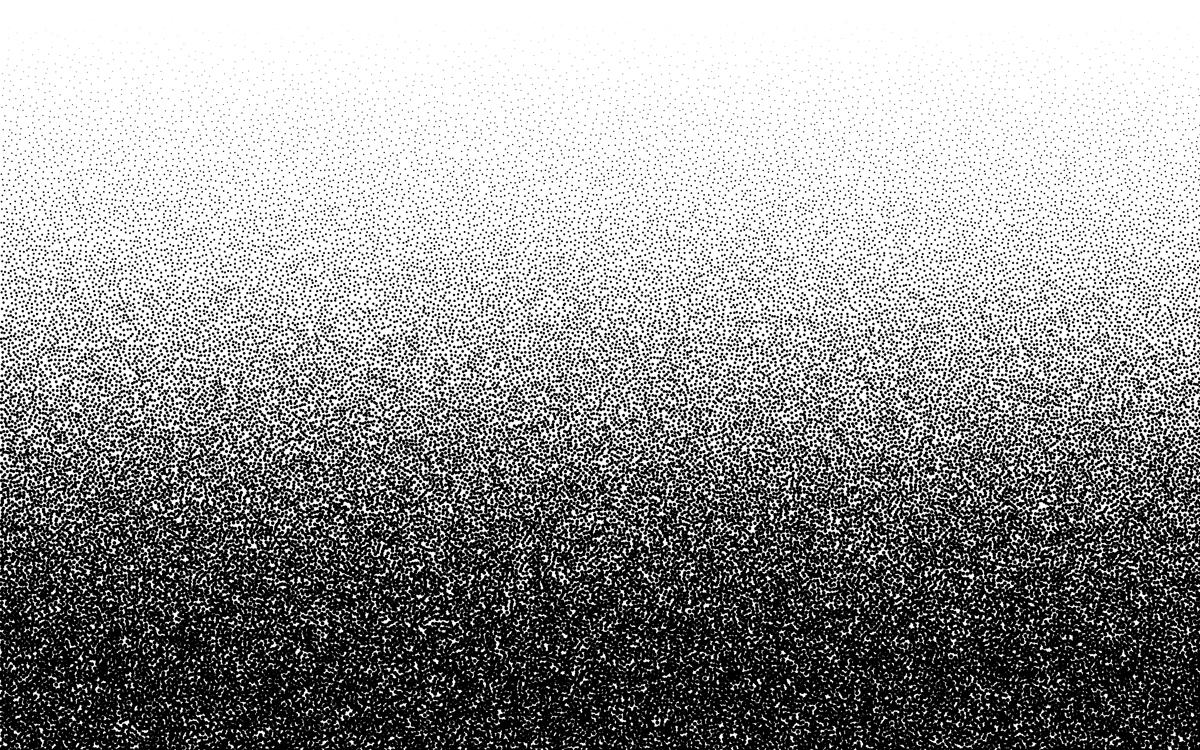
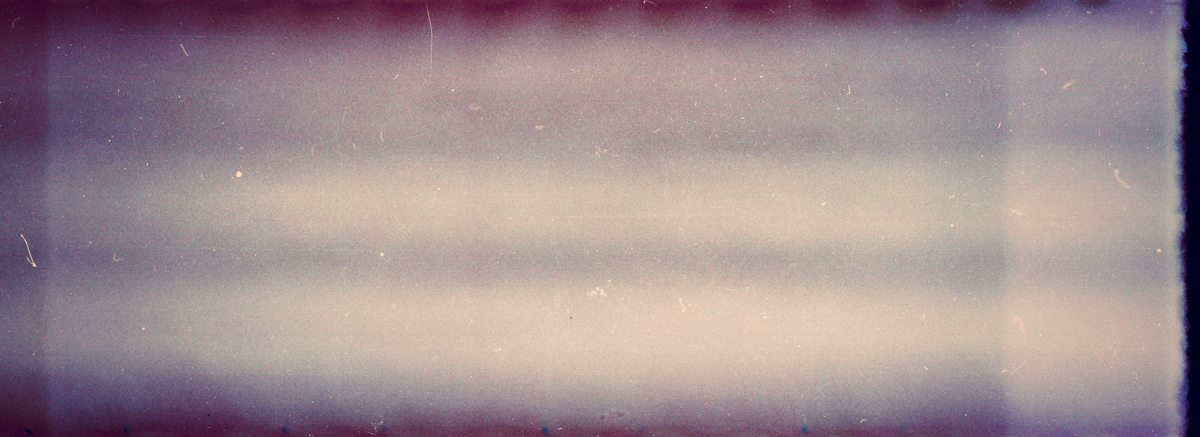
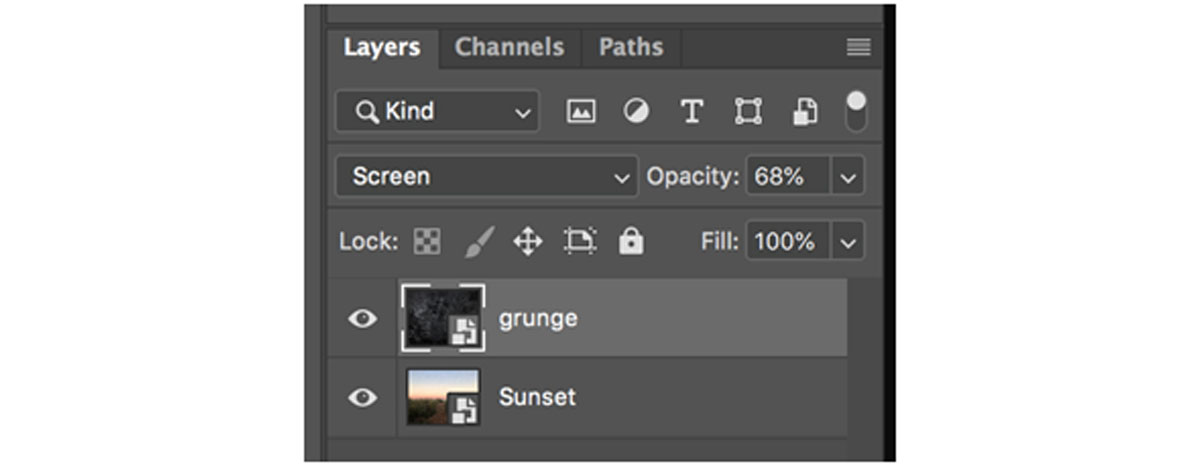 Your file should look like this: Texture layer on top, set to a non-normal blending mode, with an opacity less than 100%. (Since the texture in this example is mostly black, the blending mode chosen is “screen.”)
 - Optional: Manipulate the texture’s levels, color, and intensity. If you don’t love the way your texture looks, you can edit that layer the way you would an image. Click ctrl/command+L to bring up the levels panel and shift the black or white arrows to get a more intense effect, depending on your blending mode. If your texture has a slight tint that you want to remove, convert the texture layer to black-and-white. You can even add a mask and paint in shades of black on areas where you think the texture is too aggressive. These small tweaks often make a big difference in the overall effect.
Want to add even more to this image or artwork? Click here to learn how to add doodles on top of your image for an Instagram-worthy edit. Looking for more fun and easy photography tutorials? Discover new ways to edit your sunset pictures and create a digital photo collage. Are you a current student? See how you can save over 60%.


